
Healthy soil is the foundation of every thriving garden—and compost is the fastest, most affordable way to build it. If you’ve ever watched kitchen scraps and yard waste transform into crumbly, dark humus, you know why gardeners call it “black gold.” These composting tips will show you how to turn everyday waste into a nutrient-rich amendment, speed up decomposition safely, and solve the common problems that can stall or stink up your pile. Whether you’re composting in a suburban yard, a small balcony, or a homestead, you’ll find practical strategies for reliable results.
For a steady supply of non-potable water to keep your compost evenly moist without tapping your main supply, consider capturing and storing safe-use water with SmartWaterBox. It’s an easy way to hydrate your pile during dry spells.
Table of Contents
Composting basics that make everything else easier
Great compost relies on three fundamentals: biology, balance, and breathability.
Biology: Composting is powered by microbes, fungi, and invertebrates. In the early mesophilic phase (ambient to 104°F/40°C), common bacteria start breaking down simple material. As the pile heats, thermophilic microbes take over, driving temperatures up to 131–160°F (55–71°C). This heat accelerates decomposition and can reduce many weed seeds and some pathogens. As the pile cools, fungi and actinomycetes finish complex matter like lignin, building the stable compounds that improve soil structure.
Balance: Microbes thrive with a carbon-to-nitrogen (C:N) ratio of roughly 25–30:1. “Browns” (carbon-rich, like dry leaves and shredded cardboard) feed energy; “greens” (nitrogen-rich, like grass clippings and kitchen scraps) provide protein for microbial growth. Keeping this ratio roughly balanced prevents problems, such as ammonia smells (too much nitrogen) or stale, slow piles (too much carbon).
Breathability: Decomposition is aerobic by default. Airflow fuels microbes and avoids sour, anaerobic conditions. Structure from coarse browns (small sticks, shredded stems) creates pockets that let oxygen circulate. Regular turning or passive aeration methods keep air moving so the pile stays active and odor-free.
Compost improves soil in more ways than one. It gently feeds plants, increases cation exchange capacity, and adds stable organic matter that boosts moisture retention and aggregates. These improvements can transform sandy soil, loosen heavy clay, and build resilience against drought and disease. Your goal is not just to make compost—it’s to cultivate a living soil ecosystem that keeps paying dividends season after season.
Pro tip: Start with what you have
Perfection isn’t necessary. Even if your browns and greens aren’t dialed to a target ratio right away, a modest pile built with diverse, shredded inputs will break down. You can adjust as you go with small additions of browns or greens—and by monitoring moisture and smell.
What to add and what to avoid for reliable results
Knowing what belongs in your pile keeps it safe, fast, and problem-free. Use these composting tips to curate the right ingredients.
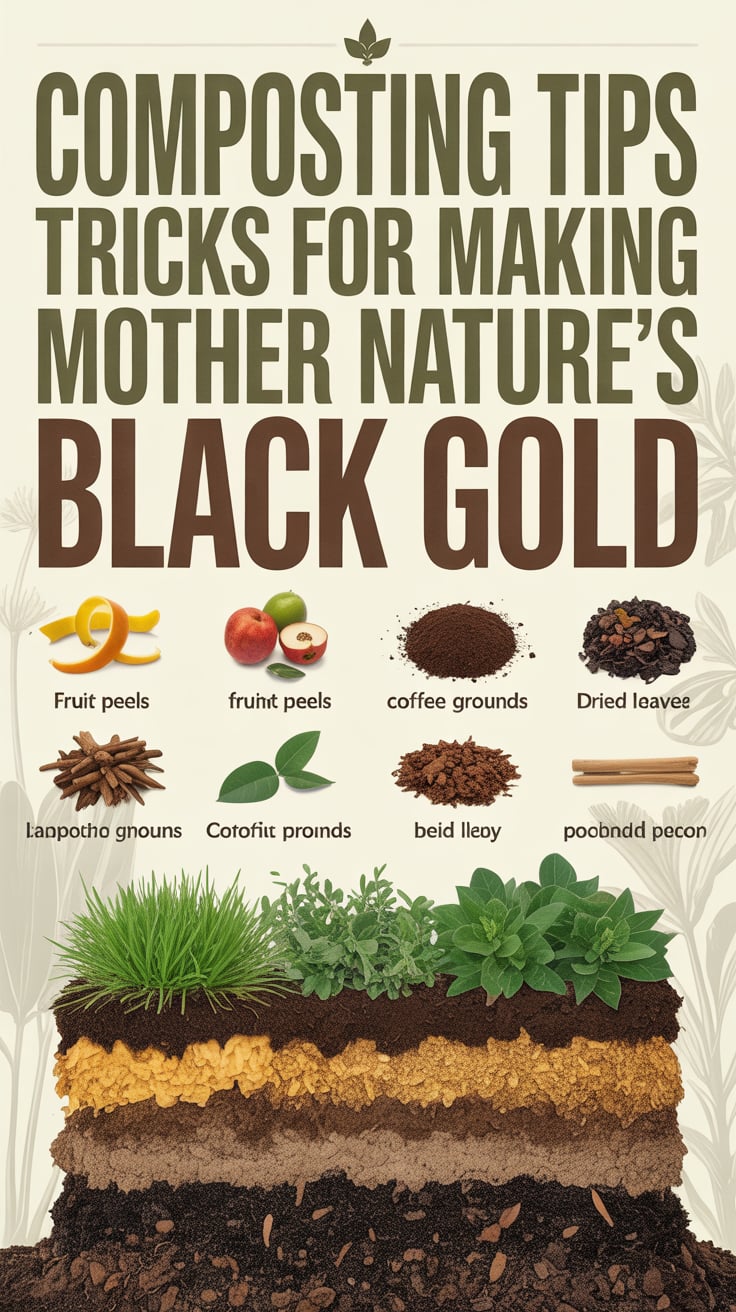
Green materials (nitrogen-rich)
- Vegetable and fruit scraps (avoid large amounts of citrus at once)
- Coffee grounds and paper filters
- Fresh grass clippings (mix with browns to prevent matting)
- Fresh garden trimmings and spent annuals
- Manure from herbivores (cow, horse, rabbit, sheep), ideally aged and mixed; avoid pet waste
Brown materials (carbon-rich)
- Dry leaves (shredded improves speed)
- Straw and hay (seed-free straw preferred)
- Shredded cardboard and paper (plain, non-glossy; remove tape)
- Wood chips and sawdust (from untreated wood; use sparingly as they’re very carbon-heavy)
- Small sticks and stems for airflow
Use caution or avoid
- Meat, fish, dairy, and oily foods: Attract pests and cause odors
- Diseased plants or heavily seed-laden weeds: Unless you can monitor hot composting above 131°F/55°C consistently for days, skip these
- Cat and dog waste: Can harbor pathogens
- “Compostable” plastics: Many require industrial facilities
- Large branches: Chip or omit
- Treated/painted wood scraps and glossy printed paper: Chemical concerns
Chop and blend for speed
Smaller particles expose more surface area to microbes. Chop kitchen scraps, shred leaves, and blend puck-like grass layers with coarse browns to prevent slimy mats that turn anaerobic.
Layer as you build
As you add material, alternate handfuls or thin layers of greens and browns. Aim for a cake-like stack: one portion greens to two or three portions browns by volume. Sprinkle a bit of finished compost or garden soil occasionally to inoculate with microbes and stabilize odors.
Choosing and building a compost system that fits your space
There’s no single “best” system—choose based on your space, time, and goals. The right fit is the one you’ll use consistently.
Open piles and bays
- Best for: Yards with space, heavy seasonal leaf loads
- Pros: High capacity, easy to scale, reaches hot temps easily
- Considerations: Requires manual turning with a fork; use chicken wire or pallets to contain
Compost tumblers
- Best for: Small yards, faster mixing without heavy lifting
- Pros: Clean and tidy; easy aeration via rotation
- Considerations: Limited capacity; avoid overloading with wet greens to prevent sogginess
Worm bins (vermicomposting)
- Best for: Indoor/garage/balcony, continuous processing of kitchen scraps
- Pros: Produces worm castings rich in microbial life; low odor when balanced
- Considerations: Keep bedding (shredded paper/coco coir) moist but not wet; avoid salty or spicy foods
Bokashi pre-fermentation
- Best for: Small spaces and fast pre-processing of food waste (including some items not ideal for standard compost)
- Pros: Shrinks and preserves nitrogen in kitchen scraps before composting
- Considerations: Results need to be buried or added to compost to finish; acidic leachate must be handled correctly
How big is big enough?
A hot compost pile needs mass to retain heat: roughly 3×3×3 feet (1 m³) is a common minimum. Smaller piles can still compost but are more sensitive to moisture swings and may run cooler.
Easy build tips
- Use pallets or wire mesh to make a sturdy, breathable bin
- Create a coarse “air floor” with sticks or wood chips at the base
- Stage browns and greens nearby so you can layer as you add
- Keep a lid or tarp handy to protect from heavy rain that can waterlog your pile
Composting tips for moisture and airflow mastery
Moisture and air are the throttle and oxygen pedal of composting. Get these right, and most other issues fade.
The squeeze test
Your pile should feel like a wrung-out sponge—moist but not dripping. Grab a handful and squeeze:
- If water streams out, mix in dry browns and fluff the pile
- If it feels dry and crumbly, sprinkle water as you turn or add moist greens
During dry seasons, topping the pile with a breathable cover or a layer of cardboard helps retain moisture. In rainy seasons, a roof or tarp prevents sogginess while still allowing air to reach the heap.
Aeration options
- Active turning: Every 1–2 weeks during the active phase keeps temperatures up and odors down
- Passive airflow: Build vertical air channels using perforated PVC or bundles of sticks; layer coarse browns to avoid compaction
- Tumbler rotation: Spin every 2–3 days initially, then weekly as heat subsides
If you use stored non-potable water for your garden and compost, tools that help you capture and dispense it safely can make upkeep easier. Systems like SmartWaterBox are useful when municipal restrictions or droughts make hose watering less practical.
Temperature tracking
A compost thermometer helps you manage the thermophilic phase. Target:
- 131–160°F (55–71°C) for several days to a couple of weeks for hot composting
- Turn when temps peak and begin to fall, or if the pile exceeds 160°F (71°C)
- If heat never arrives, increase greens, add moisture, or build a larger mass
Seasonal adjustments
- Summer: Prevent drying by covering and adding water as you turn
- Winter: Insulate with straw bales or leaves; feed small amounts consistently; hot piles can still cook in cold weather with enough mass and browns
How to speed up decomposition without gimmicks
You don’t need special powders or pricey “starters” if you master fundamentals. These composting tips will shave weeks off your timeline safely.
Dial in the C:N ratio
- If the pile is slow and woody, add moist greens like grass clippings, coffee grounds, or manure
- If the pile smells like ammonia, balance with dry leaves or shredded cardboard
Feed the microbes tiny bites
Chop and shred inputs. Break down corn cobs, squash vines, and branches into small pieces. Mix dense greens with coarse browns to avoid layers that compact.
Add proven accelerators
- Finished compost or healthy garden soil: Inoculates microbes and buffers pH
- Coffee grounds: Nitrogen-rich and fine-textured; mix well with browns
- Manure from herbivores: A potent nitrogen kick; don’t overdo or it may smell
A small amount of well-made charcoal (biochar), pre-soaked in compost leachate or diluted compost extract, can add porosity and microbial habitat. Keep it under 5–10% by volume to avoid drying the pile.
Match your method to your goal
- Hot composting: Build a sizable pile quickly, balance C:N closely, keep it moist and turn as temperatures fluctuate
- Cold composting: Add as you go; requires patience but produces excellent fungal-rich compost over months to a year
Reduce waste upstream
Pantry planning reduces spoiled food in the first place. If you’re interested in resilient food storage that cuts waste and makes better use of your harvests, resources like The Lost SuperFoods offer general guidance on preservation ideas that can complement a low-waste kitchen and healthier compost stream.
Troubleshooting smells, pests, and other common problems
Even well-run piles hit snags. Use these composting tips to diagnose issues quickly.
Odors
- Ammonia smell: Too much nitrogen or too wet; add dry browns and turn
- Rotten/putrid smell: Anaerobic pockets; fluff the pile, add coarse browns, and avoid compact layers of grass or wet food
- Vinegar-like sourness: Often from overly acidic, wet inputs (like fruit heaps); mix with browns, check drainage
Pests
- Flies: Bury food scraps under several inches of browns; avoid exposed fruit peels
- Rodents: Skip meat, fat, and grain-heavy leftovers; use rodent-proof bins or wire mesh bottoms; keep a tidy perimeter
- Raccoons: Strong lids and avoiding attractants are key; cover fresh greens promptly
Too wet or too dry
- Soggy: Add shredded leaves/cardboard, turn for airflow, cover to shed rain
- Dusty dry: Add water as you turn; incorporate moisture-rich greens
Pile won’t heat up
- Small or scattered pile: Consolidate to reach that 3×3×3 ft critical mass
- Not enough nitrogen: Add greens or manure
- Too dry: Add water evenly; moisture is often the hidden culprit
Weed seeds and diseases
Consistent temperatures above 131°F/55°C for several days help reduce many seeds and some pathogens, but not all. If you can’t confirm temps, keep invasive seed heads and diseased plant tissue out of your pile and dispose of them appropriately.
When to turn
Turn when temperature peaks and falls, when odors appear, or when you see compaction and matted layers. Each turn blends fresh oxygen and resurfaces materials for even breakdown.
Better compost through smarter materials handling
A little organization makes your compost both faster and cleaner.
Stage materials
Keep a bin of shredded browns near your kitchen or compost area so every batch of food scraps can be capped or mixed immediately. This “cap” controls odor and balances moisture as you feed the pile.
Pre-process problem inputs
- Grass clippings: Mix with browns the same day to avoid slime
- Woody prunings: Chip or shear to thumb-size or smaller
- Autumn leaves: Shred with a mower and store in bags for year-round browns
Manage liquids thoughtfully
Leachate is the liquid that drains from decomposing material; it can be nutrient-rich but also anaerobic. Avoid using raw leachate on plants. Instead, keep piles moist rather than wet, and when in doubt, dilute any captured liquid heavily and apply to the pile rather than directly to beds.
Small-space strategies
If you compost on a balcony or indoors:
- Use a sealed, aerated container for pre-collection of scraps
- Move material to a worm bin or community drop-off weekly
- Balance bedding (browns) and moisture; keep salt and citrus modest in worm systems
Urban water resilience
If you garden where hose use is restricted, a reliable, clean way to stash non-potable water for compost and landscape use can keep your system humming. Options like Joseph’s Well can complement a water-resilient setup for gardens and compost without relying solely on municipal supply.
Composting tips for producing stable, finished black gold
Knowing when compost is “done” matters. Immature compost can rob nitrogen from soil or carry too much heat and acidity for tender seedlings.
Signs of maturity
- Appearance: Dark, crumbly, soil-like texture
- Smell: Earthy, like a forest floor (no sour or ammonia odor)
- Temperature: Ambient, no internal heat
- Recognition: Original materials are largely unrecognizable save for a few woody specks
The cure is the key
Even after active composting, a curing phase of 2–4 weeks (or more) lets microbial communities stabilize. Pile the nearly finished compost, keep it slightly moist, and protect it from heavy rain while it rests. Curing reduces the risk of phytotoxic compounds and helps ensure gentle nutrient release.
Simple tests
- Germination test: Plant a few fast seeds (like radish) in a 50/50 compost-sand mix. Good germination points to maturity.
- Bag test: Seal a moist handful in a bag for a couple of days. If it smells sour on opening, it needs more curing.
Safe, effective uses
- Garden beds: Spread 0.5–1 inch over beds and work lightly into the top few inches
- Mulch: Use as a 1–2 inch top-dressing around perennials; refresh seasonally
- Lawn: Top-dress 0.25–0.5 inch and rake in; improves water retention and soil biology
- Potting mixes: Blend 10–30% finished compost with other components; sieve to remove coarse bits
Compost extract vs. tea
If you want a quick inoculant, a simple compost extract (stir finished compost in clean water, steep briefly, strain) can be applied to soil. Avoid risky aerated “teas” that can multiply unwanted microbes if prepared improperly. When in doubt, apply compost itself—solid material delivers biology, nutrients, and structure all at once.
Closing the loop: resilient systems that support your compost
Good composting becomes easier when your garden and household systems work together.
Design for steady inputs
Plan beds and harvest schedules so plant material flows to your compost in manageable waves. Fall leaves? Shred and store. Spring grass? Blend with those leaves. Kitchen scraps? Keep a dedicated caddy and add a scoop of browns every time.
Use compost to reduce store-bought inputs
With rich compost, you’ll rely less on bagged fertilizers. Soil life turns organic matter into plant-available nutrients over time, improving structure and water retention for durable fertility.
Link your water strategy to compost care
Water resilience and compost success go hand in hand. Non-potable water storage—especially during dry months—can keep your pile at the ideal moisture level without stressing your main supply. Solutions like SmartWaterBox and Joseph’s Well can play a supportive role in that setup.
Lower waste with smarter food use
Composting is excellent—but preventing waste is even better. Learning time-tested preservation and pantry strategies can dramatically cut spoilage and keep your compost balanced with a steadier, more varied input. For general guidance, The Lost SuperFoods offers ideas that complement a low-waste kitchen.
A simple call to action
- Start a small system this week—bin, tumbler, or worm bin, whatever fits
- Stock a bag of shredded browns to cap every addition of greens
- Check moisture with the squeeze test; adjust with water or browns
- Turn or fluff regularly, and keep notes on what works
By focusing on a few high-leverage habits, you’ll create Mother Nature’s black gold reliably and with less effort each season.
Conclusion
Turn waste into wealth by mastering a few core composting tips. Balance greens and browns, keep the pile moist and airy, and use simple diagnostics—temperature, smell, and the squeeze test—to guide adjustments. With these tricks for making Mother Nature’s black gold, you’ll build living soil that grows healthier plants, shrugs off stress, and steadily reduces your garden costs. Start small, observe, and refine; the biology will do the rest.
FAQ
What is the ideal ratio of greens to browns in compost?
Aim for a carbon-to-nitrogen ratio of about 25–30:1. Practically, that’s roughly one part greens to two or three parts browns by volume. Adjust as needed if the pile smells (add browns) or runs slow (add greens).
How wet should my compost pile be for best results?
Moist like a wrung-out sponge. Use the squeeze test: if it drips, add dry browns and turn; if it’s crumbly, add water as you mix. Consistent moisture is essential for fast, odor-free decomposition.
How long does it take to make finished black gold?
With hot composting and regular turning, you can see finished compost in 6–10 weeks. Cold composting may take 6–12 months. Curing for 2–4 additional weeks after active composting helps ensure stability.
Can I compost in a small apartment?
Yes. Vermicomposting with a worm bin is ideal for small spaces. Balance food scraps with bedding like shredded paper, keep it moist but not wet, and avoid very salty or greasy foods. Many cities also offer compost drop-offs.
What are the best composting tips for avoiding bad smells?
Bury food scraps under browns immediately, keep the pile airy, and balance greens with enough dry carbon. If you smell ammonia or rot, turn the pile, add browns, and check moisture. Most odors are solved by improving aeration and balance.