
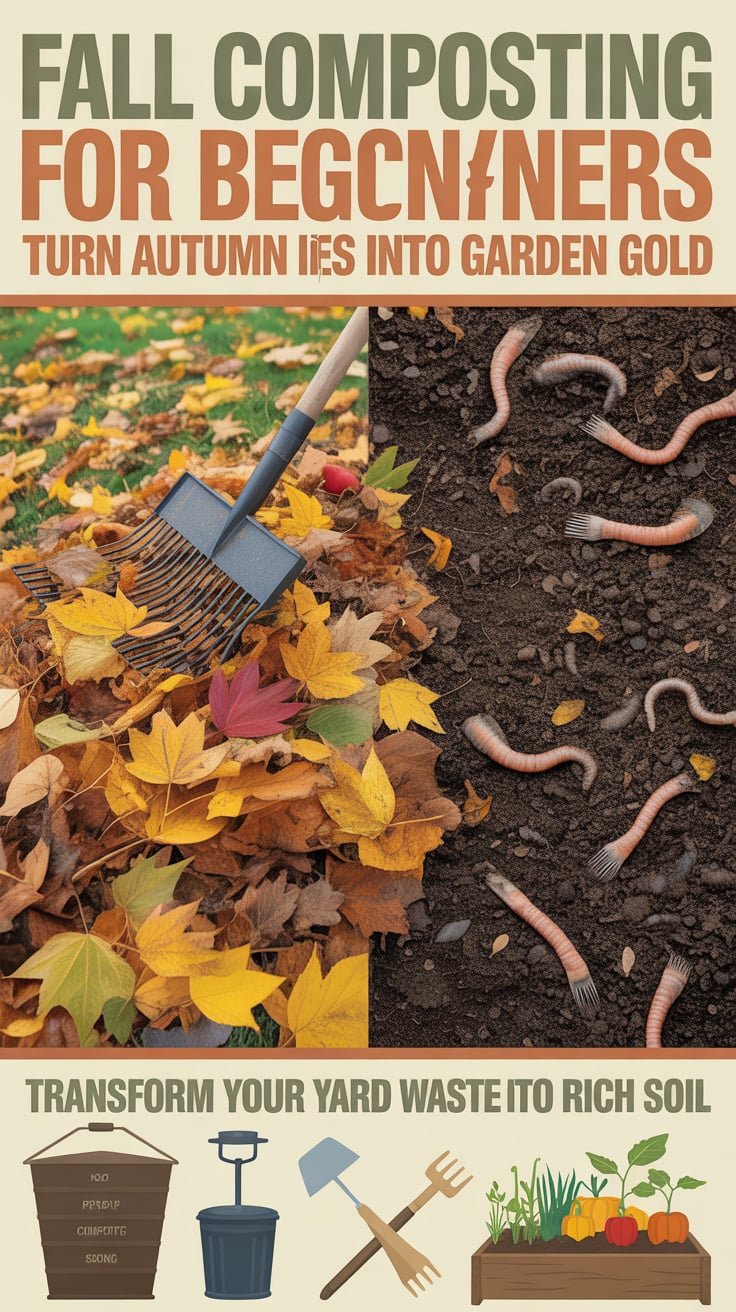
Starting a compost pile in autumn is one of the most forgiving ways to learn. The season hands you mountains of leaves and garden cleanup debris—the perfect fuel—while cooler weather keeps odors down and pests at bay. This guide walks you through Fall Composting For Beginners step by step, from what to add and how to layer, to managing moisture and using your finished compost before spring.
If you’re looking to reduce kitchen waste on two fronts—compost what you can and preserve what you can’t—consider a practical guide like [The Lost SuperFoods]. It pairs well with a composting habit by helping you keep more food out of the trash in the first place.
Table of Contents
Why fall is the easiest season to start composting
Autumn uniquely supports new composters. Your yard and neighborhood supply “browns” on demand, cooler temperatures moderate smells, and the gardening calendar slows down enough to make time for a new habit. Here’s why you’ll love starting now:
- Free carbon everywhere. Dry leaves are carbon-rich “browns,” the backbone of a balanced compost. A few tarps or bags of leaves set aside in fall become your year-round brown stash for balancing wetter “greens.”
- Cooler air, calmer pile. Fall piles often run warm internally, but the surrounding cool air discourages flies and keeps odors minimal. Beginners can make mistakes without annoying the neighbors.
- Slower but steadier breakdown. The biology of compost doesn’t stop in fall; it just slows a bit. Microbes, fungi, and helpful invertebrates keep working, especially when your pile size and moisture are on point.
- Natural rhythm with garden cleanup. Spent annuals, frost-nipped herbs, and vegetable vines meet their match when mixed with shredded leaves. You’ll also avoid sending nutrition to the landfill.
The goal of a healthy compost pile is a balance of carbon and nitrogen (often summarized as a C:N ratio of roughly 25–30:1). In plain speak: for every bucket of wet, green stuff, plan to use two or three buckets of dry, brown stuff. Fall gives you a head start because browns are abundant and easy to store. Whether you build an open leaf bin, start a budget pallet system, or roll with a tumbler on a patio, fall conditions make the learning curve gentler.
Essential materials for Fall Composting For Beginners
Great compost starts with the right mix of materials. Think of ingredients in two families: carbon-rich “browns” and nitrogen-rich “greens.” Browns provide energy and structure; greens bring protein and moisture.
Common browns (carbon):
- Dry leaves (shredded if possible)
- Straw, hay that isn’t sprayed, or dried ornamental grasses
- Cardboard and paper (shredded; avoid glossy/coated)
- Sawdust or wood shavings in small amounts (untreated wood)
- Pine needles mixed lightly with other browns
Common greens (nitrogen):
- Fruit and vegetable scraps
- Coffee grounds and paper filters
- Fresh grass clippings
- Green plant trimmings and spent annuals
- Fresh manure from herbivores (well mixed and allowed to age)
Autumn heroes:
- Leaves are the MVP. Shredded leaves break down faster and resist matting.
- Pumpkins and squash shells add moisture and sugars; smash and mix with browns.
- Corn stalks, sunflower stems, and pruned perennials provide structure; chop them small.
What to avoid or limit:
- Meat, fish, dairy, and oils (odor and pests)
- Cooked foods or greasy leftovers (same reason)
- Diseased plants or plants with mature seed heads if your pile won’t get hot
- Pet waste from cats/dogs (pathogens)
- Walnut leaves and husks in large amounts (juglone can inhibit some plants)
- Glossy, heavily dyed paper or coated cardboard
Aim for a texture that promotes airflow. Shredded leaves, ripped cardboard, chopped stems, and crumbled pumpkin shells help maintain pore spaces. When in doubt, add more browns. They absorb excess moisture, sweeten the smell, and insulate your pile. Keep a stash of dry leaves in breathable bags or a separate wire bin for handy access throughout winter and spring.
Pro tip: Greens can be wetter than you think. Coffee grounds behave like a “green,” and so do heavily watered kitchen scraps. If your pile looks sludgy, fold in extra shredded leaves or torn cardboard to restore balance.
Choosing a compost system that fits your space and lifestyle
Your compost system should match your location, time, and goals. You can make nutrient-rich compost with any of these options:
- Open pile or three-bin system: Ideal for yards with space. Piles 3′ x 3′ x 3′ or larger insulate better and can get hot enough to speed decomposition.
- Wire-leaf cage or pallet bin: Simple, low-cost containment that keeps things tidy while letting air flow. Great for leaf-heavy composting and leaf mold.
- Compost tumbler: Neat, rodent-resistant, and fast when managed well. Best for smaller volumes with regular turning.
- Worm bin (vermicomposting): Indoors or in a garage/shed where temps are moderate. Great for kitchen scraps year-round with minimal odor.
- Bokashi pre-composting: Ferments kitchen scraps (including some that are tricky in a regular pile). After fermenting, bury or add to an outdoor compost to finish.
- Trench composting: For garden beds in fall, dig a trench, add chopped scraps + leaves, backfill. By spring, much of it will have broken down in place.
How to choose:
- Small patio or HOA rules? A tumbler or worm bin keeps things compact and neat.
- Tons of leaves and yard waste? A pallet bin or open pile shines.
- Cold climate with long winters? A larger pile, insulated with leaves, keeps life chugging. A worm bin indoors handles kitchen scraps all winter.
- Busy schedule? A leaf mold cage is nearly passive: fill with leaves, moisten, and let fungi do the slow work.
No matter the system:
- Ensure drainage below the pile; soggy equals smelly.
- Make it easy to access with a wheelbarrow or compost fork.
- Keep a bucket with a tight lid by the door for kitchen scraps.
- Store your leaf “brown bank” nearby to balance wet additions quickly.
Rodent-proofing tips:
- Avoid meat, oils, and bread.
- Bury kitchen scraps in the pile rather than leaving them exposed.
- Consider a tumbler or a lidded, hardware-cloth–lined bin if critters are persistent.
Step-by-step setup for a thriving fall pile
A good start boosts confidence. Use this simple build:
- Pick the spot
- Partial sun speeds things slightly; shade is fine.
- Ground contact is best; soil microbes will inoculate your pile.
- Provide wind protection if your area is exposed; it helps retain moisture and heat.
- Lay a breathable base
- Start with a 4–6 inch layer of coarse browns like small sticks, corn stalks, or wood chips. This lifts the pile for drainage and airflow.
- Alternate layers
- Add a 2–3 inch layer of greens (kitchen scraps, fresh clippings).
- Cover fully with 4–6 inches of shredded leaves or other browns.
- Repeat until the pile is at least 3 feet high. Always cap with browns to discourage pests and lock in odor.
- Adjust moisture
- Target “wrung-out sponge” moisture: damp but not dripping. Squeeze a handful; only a drop or two should come out.
- If too wet, add shredded leaves and fluff with a fork. If too dry, sprinkle water as you build.
- Incorporate inoculants (optional)
- A few handfuls of finished compost, healthy garden soil, or older leaf mold introduced between layers can seed your pile with microbes.
- Fresh, spent coffee grounds (a green) can help jumpstart warming but don’t overdo it.
- Cap and insulate
- Finish with a thick leaf blanket. In rainy climates, use a breathable cover like a tarp propped to shed water without sealing the pile.
Water access can be a bottleneck if your outdoor spigots get shut off for winter. Storing rainwater during fall storms gives you a convenient, non-chlorinated supply for keeping the pile moist. A compact storage solution like [SmartWaterBox] can make it easier to collect and dispense water as needed without running hoses every time.
Finally, set expectations. A fall-built pile may heat up notably in the first weeks if you’ve balanced ingredients and moisture. As nights cool, it may drop to a steady warm or cool state. That’s normal. Keep adding small batches of scraps tucked into the center and cover with browns through the season.
Managing moisture, airflow, and temperature in cool weather
Moisture, air, and particle size are the levers that control decomposition speed and odor. In fall and early winter, the air is drier in some regions and wetter in others; manage accordingly.
Moisture management:
- Too wet signs: slimy mats, rotten or sour odor, visible leachate. Fix by forking in shredded leaves or torn cardboard, creating vertical chimneys for air, and capping with more browns.
- Too dry signs: pile doesn’t settle, materials stay crisp, little warmth. Fix by watering in layers during a turn and adding more greens. Use collected rainwater if available.
Airflow and structure:
- Shred or chop bulky materials so they mix well without compacting.
- When turning, pull outer drier material into the center and bring the center outward. Aim to fluff rather than mash.
- For passive airflow, insert perforated PVC or sturdy sticks vertically to create channels.
Temperature guidance:
- Hot composting (130–150°F) speeds breakdown and reduces weed seeds and some pathogens, but it’s optional for beginners.
- Warm to cool piles still make beautiful compost; it just takes longer.
- A compost thermometer can help you learn, but your nose and hands are good guides. Earthy smell and springy texture mean you’re on track.
Turning schedule:
- Tumbler: 2–3 spins, 2–3 times per week.
- Open pile: turn every 2–4 weeks in fall if you want speed; monthly or less for low-maintenance.
- Each turn is a chance to correct moisture and re-balance the brown-to-green ratio.
Smell troubleshooting:
- Earthy forest-floor smell: good.
- Sour or rotten: too wet/anaerobic. Add browns, turn, and loosen.
- Ammonia-like: too many greens or too little carbon. Add shredded leaves or paper and mix.
Critters and pests:
- Always bury food scraps in the center and cap with browns.
- Avoid cooked foods and oils.
- Use secure bins or tumblers if raccoons or rodents are common.
Seasonal tip: As winter approaches, stop adding large volumes to one bin; let it process. Start a new bin or leaf cage for fresh inputs. In very cold zones, simply keep covering kitchen additions with leaves and plan for a spring “reboot” turn.
Leaf-smart strategies that speed results
Leaves are the essence of fall composting—and a few simple tactics make them work harder and faster for you.
Shred for surface area:
- Use a mower over raked piles or a leaf shredder. Shredded pieces resist matting, absorb moisture evenly, and decompose faster.
- If you can’t shred, alternate thin layers of whole leaves with greens and other browns to prevent dense mats.
Build a leaf “bank”:
- Fill breathable bags or a wire bin with dry leaves. Keep them handy to cover every kitchen bucket you add over winter.
- Having extra browns is the number-one difference between a sweet-smelling pile and a swampy one.
Try a dedicated leaf mold pile:
- Leaf mold is leaf-only compost, led by fungi rather than bacteria. It’s slower but nearly hands-off and produces an incredible, moisture-holding soil conditioner.
- Set up a simple wire cylinder, fill with shredded leaves, moisten, and leave it. Turn once or twice over 6–12 months. Use as mulch, seed-starting mix component, or to lighten heavy soils.
Integrate seasonal waste:
- Pumpkins and gourds: Smash them to palm-sized pieces. Mix with leaves at a 1:2 or 1:3 ratio. Remove candles and plastic decor first.
- Corn stalks: Chop into 3–6 inch segments for structure. If left whole, they can create air tunnels but slow down the batch.
- Coffee grounds: Treat as a green; mix thoroughly to avoid dense clumps. Great for balancing dry leaves.
- Holiday greens: Plain, untreated wreaths and garlands can be clipped and composted. Avoid glitter, wire, and synthetic decorations.
Watch for contaminants:
- Leaves from heavily trafficked streets may carry residues; composting helps, but use judgment.
- If your lawn or hay was treated with persistent herbicides (aminopyralid, clopyralid), avoid adding those clippings—they can harm garden plants even after composting.
Stretch goal for speed:
- Target a starting pile size of at least 3′ x 3′ x 3′. Add a sprinkle of finished compost or garden soil between layers to inoculate. Keep moisture steady, turn every 2–3 weeks, and you can have usable compost by spring.
Using and storing your finished compost
Knowing when compost is “done” is part art, part science. Fall-built piles may finish by late winter to spring if well managed.
Signs of readiness:
- Dark brown, crumbly texture with an earthy smell
- Few recognizable ingredients; small leaf or twig bits are fine
- Temperature near ambient for a couple weeks
- Stable when bagged or piled (no reheating)
Curing matters:
- After active composting, let material “cure” for 2–4 weeks. This quiet phase stabilizes nutrients and completes decomposition.
- Keep it slightly moist and protected from heavy rain to avoid leaching.
Screening for finesse:
- Run finished compost through 1/2-inch hardware cloth for a finer product.
- Return larger bits to the active pile as “browns with benefits” (they’re microbe-rich).
Ways to use compost before spring:
- Mulch perennials and shrubs with a 1–2 inch layer to buffer winter temperature swings.
- Top-dress lawns with a thin, 1/4–1/2 inch layer; broom it into the turf.
- Fill raised beds to the brim in late fall; compost settles, creating a fertile surface by spring.
- Blend into potting mixes at 10–30% for container gardens. Avoid using 100% compost in pots; it can compact.
- Brew aerated compost teas cautiously if you’re experienced, or make simple non-aerated extracts for soil drenching. Always use mature compost and clean equipment.
Storage tips:
- Keep screened compost under a tarp, breathable cover, or in bins to prevent nutrient loss.
- If you expect heavy winter rains, cover to avoid leaching. In snow zones, stash bags or tubs in a shed or garage.
Remember: compost is a soil conditioner, not a stand-alone fertilizer. It improves structure, water-holding, microbial life, and slow-release nutrition. With regular applications, your garden becomes more drought-resilient and disease-suppressive over time.
Simple tools and helpful add-ons for new composters
You don’t need fancy gear to succeed, but a few items make life easier:
- A sturdy compost fork or pitchfork for fluffing and turning
- A covered kitchen scrap pail with a handle
- Breathable bags or a separate cage to store dry leaves
- A hose, watering can, or stored rainwater supply
- Optional: compost thermometer, hardware cloth for screening, hand pruners for chopping stems
Water access is often the hidden friction point—especially once outdoor spigots are winterized. If you want a simple way to store and dispense water for your pile and garden, explore compact, mobile options like [SmartWaterBox]. Collected rainwater is naturally chlorine-free and gentle on compost microbes.
And because the best waste is the waste you never make, pairing composting with better pantry planning and preservation can dramatically cut trash and save money. If that sounds appealing, a reference like [The Lost SuperFoods] can help you stretch harvests and reduce spoilage, complementing your compost habit.
Conclusion: your fall compost is the start of a healthier garden
With a leaf pile at your feet and cool air on your side, there’s no better time to begin than now. Fall Composting For Beginners comes down to three habits: feed the pile a mix of greens and plenty of browns, keep it as damp as a wrung-out sponge, and fluff it when it compacts. Do that, and by spring you’ll have a rich, earthy amendment that kickstarts beds, strengthens seedlings, and buffers your soil through heat and drought.
Store extra leaves, tuck kitchen scraps under a brown cap all winter, and let the microbes do the heavy lifting. Your future garden—and your trash can—will both be lighter for it.
FAQ
What’s the easiest way to start Fall Composting For Beginners in a small space?
A compact tumbler or a worm bin is ideal. Keep a sealed pail for kitchen scraps, add a handful of shredded paper or leaves as you go, and empty into the tumbler or feed the worms weekly. Always cover fresh additions with browns to prevent odor.
Can I compost through winter in a cold climate?
Yes. A larger, well-insulated pile continues to break down slowly even when the surface freezes. Keep adding scraps to the center and cap with leaves. If it becomes too hard to turn, pause active management and resume in spring with a thorough turn and moisture check.
How long until I get usable compost from a fall-built pile?
Fast, hot piles with good balance and regular turning can yield compost in 8–12 weeks, though curing adds time. Many fall piles produce finished material by late winter or early spring. Passive or leaf-heavy piles may take 6–12 months, which is still fine.
Can I compost only leaves?
Yes, and the result is called leaf mold. It takes longer (often 6–12 months) because leaves are mostly carbon. Maintain moisture and turn once or twice. For faster general compost, mix leaves with greens like kitchen scraps or coffee grounds.
What common mistakes should beginners avoid?
Avoid adding too many wet “greens” without enough “browns,” which causes odor; neglecting moisture (too dry slows everything, too wet goes anaerobic); leaving food scraps exposed; and adding diseased plants or pet waste. Shred leaves, chop stems, and cap every addition with browns.