
Compost is the easiest way to turn kitchen scraps and yard waste into black, crumbly soil food. If you want a steady supply for a garden, orchard, or containers, a three-bin system is the gold standard. In this guide you’ll learn how to build a 3-bin compost system for FREE using pallets, scrap lumber, wire, and other scrounged materials—and how to operate it for fast, hot compost all year. If you’re also building a resilient pantry to pair with a healthy garden, explore The Lost SuperFoods for time-tested preservation ideas that reduce waste and save money.
Table of Contents
Why a three-bin system works and why it saves you money
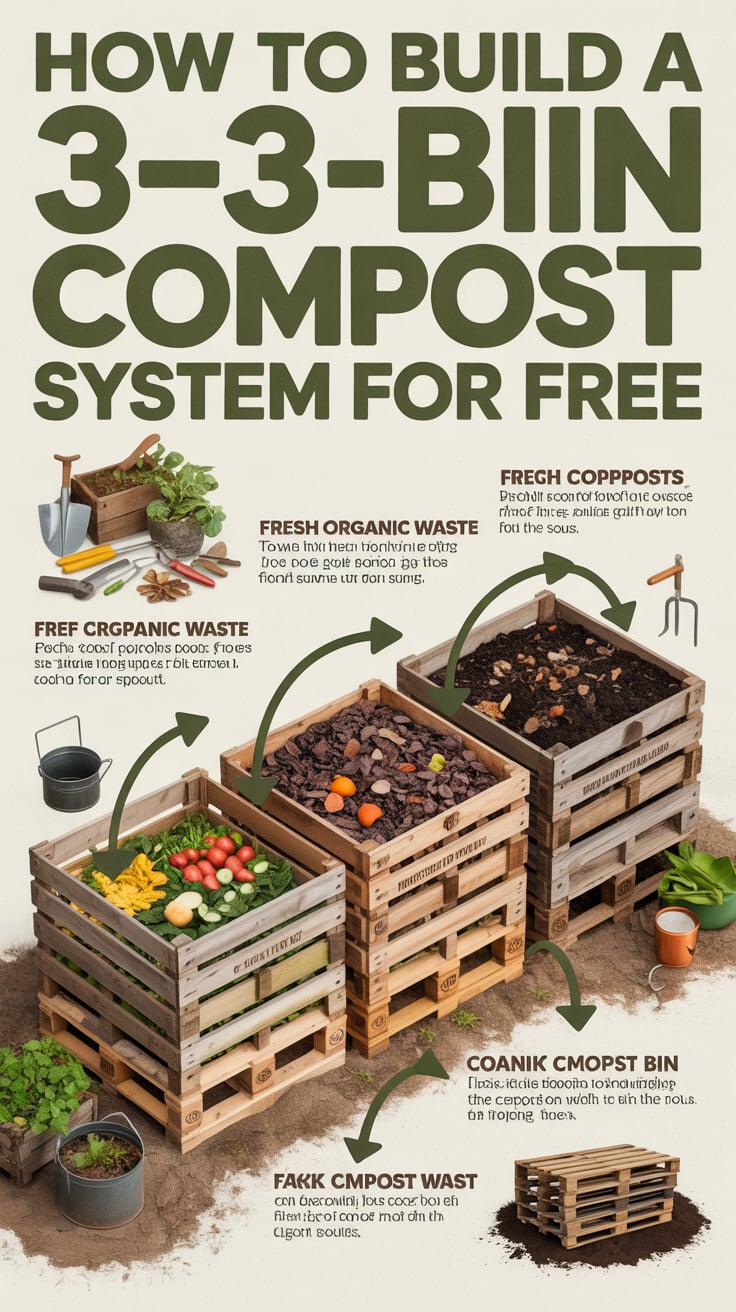
A compost pile needs the right size, ingredients, moisture, and air to heat up and break down quickly. A single heap can work, but it often turns into a cold, neglected mound you poke once a month. A three-bin system solves this by giving you a simple flow: build in Bin 1, actively decompose and turn in Bin 2, and cure finished compost in Bin 3. This structure keeps materials moving, gives you space to work, and produces a continuous supply of finished compost instead of one big batch a couple of times per year.
Here’s why the three-bin setup is so efficient:
- Volume for heat: Each bin is roughly 3–4 feet wide, deep, and tall—big enough to reach thermophilic temperatures (130–160°F) when fed and watered correctly. Heat destroys weed seeds and speeds decomposition.
- Dedicated stages: One bin for “active building,” one for “hot composting,” one for “curing.” You’re not mixing new scraps into nearly finished compost, so your final product is consistent.
- Easy turning: Turning aerates the pile, redistributes moisture, and feeds microbes fresh oxygen. In a three-bin system, “turning” is simply moving the material from one bin to the next.
- Free inputs, free structure: You can build all three bins from salvaged pallets, reclaimed lumber, wire, old fence posts, or cinder blocks. The system is durable, modular, and highly repairable.
Whether you garden in raised beds or ground-level plots, finished compost improves soil structure, water retention, and nutrient cycling. It buffers pH, feeds beneficial microbes, and creates a loose, friable texture roots love. Combined with mulching, a three-bin system can reduce irrigation and fertilizer costs substantially over a single growing season.
Finally, compost keeps organic matter out of landfills, where it would otherwise produce methane. You’ll shrink your waste stream while creating a better garden—a winning cycle that starts with a few free pallets and an afternoon of building.
Plan your build and source free materials
Your compost becomes your garden’s engine, so choose a site and materials with care.
Site selection:
- Ground contact: Place your bins directly on soil to let worms and beneficial microbes move in. Avoid concrete if possible. If you must use a hard surface, lay a base of branches, straw, or hardware cloth lined with soil to “seed” the biology.
- Sun and wind: Partial sun helps warm the pile, but full sun can dry it too fast. Light dappled shade or morning sun with afternoon shade is ideal. Orient the open fronts away from prevailing winds to reduce moisture loss.
- Access: You’ll move materials with a wheelbarrow or garden cart—plan straight, clear paths. Keep a water source nearby.
- Drainage: Avoid low spots that pond water. A gentle slope is fine.
How to source free materials:
- Pallets: Many garden centers, equipment suppliers, feed stores, and small manufacturers give away broken or extras. Ask permission; don’t take pallets marked with chemical treatments (look for “HT” heat-treated stamps rather than “MB” methyl bromide). Standard 40×48-inch pallets are ideal.
- Wire and fencing: Short rolls of old poultry netting or hardware cloth, leftover welded wire, and used T-posts are often free on local classifieds or community groups.
- Posts and fasteners: Broken fence posts, rebar offcuts, scrap 2x4s, and mismatched screws from your shop work fine. Even heavy zip ties and baling wire can do the job.
- Front slats: Saved 1×6 or pallet boards can become removable fronts. Trim and sand rough edges.
- Roofing: Old corrugated panels, rubber roofing offcuts, or tarp pieces can become optional lids to keep summer rain off and reduce winter snow load.
Safety and legality:
- Avoid pressure-treated wood manufactured before 2004 (it may contain arsenic). Newer treatment formulas are generally safer but still not ideal for direct soil contact in compost. Pallets stamped “HT” are safe options.
- Wear gloves and eye protection. Use caution with rusty nails and splinters.
- Check HOA/municipal bylaws—some areas have setback rules or rodent-proofing requirements.
Pro tip: Before building, stockpile browns (leaves, shredded cardboard) and greens (grass clippings, coffee grounds) so you can load the first bin immediately. A compost system works best when it starts hot.
How to build a 3-bin compost system for FREE: layout, size, and materials
A well-sized bin heats up faster, breaks down faster, and is easier to turn. Target each bin at roughly 3–4 feet wide by 3–4 feet deep with walls at least 36 inches high. Standard pallets make this simple: three pallets for the back row, four for the sides and dividers, and either pallets or removable slats for the fronts.
Recommended free materials checklist:
- 10–12 heat-treated pallets (extras help replace damaged ones)
- 4–6 posts: T-posts, rebar, or salvaged 4x4s for anchoring corners and dividers
- Baling wire, heavy zip ties, or deck screws for fastening
- Scrap boards (1×4 to 1×6) for removable front slats
- Wire mesh or hardware cloth for rodent-proof floors and vents (optional)
- Old hinges/latches for fronts or lids (optional)
- Reclaimed corrugated roofing or tarp for winter covers (optional)
Tools you likely already own:
- Drill/driver with bits; or hand tools and a hammer
- Handsaw or circular saw for trimming boards
- Tin snips or wire cutters for mesh
- Level and tape measure
- Work gloves and safety glasses
Layout options:
- Straight run: Three bins in a row sharing a back wall. Simplest and best for narrow spaces.
- “U” shape: Two bins side by side with the third across the end. Works well in tight corners.
- Terrace or slope: If your site slopes, step the bins down the hill. Keep each bin level.
Front options:
- Removable slats: The most user-friendly design. Drop boards into side channels so you can remove the lower slats for shoveling and replace them to hold the pile tall.
- Pallet front: A full pallet fastened at the front works, but you’ll shovel over the top or create a half-height hinged front.
- Wire door: Simple framed wire panel with hooks or latches.
Ventilation and rodent-proofing:
- Good airflow keeps your pile hot. Pallet slats create natural gaps; adding mesh prevents spills while allowing air through.
- In rodent-prone areas, line the bin floor with hardware cloth and staple it to the walls. This keeps burrowers out while allowing drainage.
With materials gathered and a layout chosen, mark your footprint. A straight three-bin run built from pallets will be roughly 12–14 feet long and 4 feet deep. Leave about 3 feet of aisle space in front for turning and wheelbarrow access.
Step-by-step construction from scavenged pallets
These steps describe a straight, side-by-side three-bin build using pallets and posts. Adapt as needed for your space and materials.
- Prepare the base
- Clear the area of grass and debris. Level it roughly with a rake or shovel.
- Optional: Lay down hardware cloth to deter burrowers. Pin it with U-staples, landscape staples, or small rocks.
- Add a thin layer of sticks or coarse mulch. This improves airflow in the bottom of each bin.
- Build the back wall
- Stand three pallets upright in a row as the back wall. Align edges and check they’re fairly level.
- Drive T-posts or rebar through the pallet corners into the ground, or set salvaged 4×4 posts behind them. Lash or screw pallets to each other and to the posts.
- Add side walls and dividers
- On each outer end, attach a pallet as a side wall perpendicular to the back wall, forming the left and right sides.
- For the two internal dividers, attach two more pallets perpendicular to the back wall, spaced to create three equal bays. Anchor each divider with a post at the front edge for strength.
- Check the corners are square enough. Compost isn’t cabinetry—sturdy is more important than perfect.
- Create the fronts
Option A: Removable slats
- Fasten vertical “tracks” on the inside of each bin’s front posts using scrap 1x2s or pallet boards. Leave a 1-inch channel to drop slats into.
- Cut several slats (1×4 or 1×6 boards, pallet boards) to fit the bin width. The bottom slat can be shorter if you want a small lip to retain material.
- Drop slats in to build the front wall. When turning, remove the lower slats for easy shoveling.
Option B: Pallet fronts
- Hinge a half-height pallet at the bottom or side to act as a gate; latch it closed with a hook or salvaged latch.
- Or simply fasten a full pallet at the front and shovel over.
- Reinforce and tie together
- Lash pallet joints with baling wire or heavy zip ties, then add a few screws where wood meets wood.
- If your area is windy, add diagonal braces inside the corners using scrap boards.
- Ventilation tweaks and lids (optional)
- Staple wire mesh on the inside if gaps are large and spill material. This also deters pests.
- Make simple lids from corrugated roofing screwed to light frames, or lay tarps in winter to hold heat and shed excess rain.
- Safety and finishing touches
- Walk around and tug on each wall. Add another tie or screw anywhere that flexes too much.
- Clear the front aisle and set a small pallet or block as a tool rest for your fork and shovel.
You now have three stout bins built entirely from salvaged materials. Next, load the first bin properly so it heats up fast and finishes strong.
Operating the system: feed, water, turn, and cure
A hot, efficient compost pile comes down to four things: carbon-to-nitrogen balance, moisture, oxygen, and sufficient mass. The three-bin setup makes it easy to manage them.
Balance browns and greens:
- Browns (carbon): dry leaves, shredded cardboard and paper, straw, wood shavings, sawdust (untreated), dried weeds, corn stalks.
- Greens (nitrogen): fresh grass clippings, coffee grounds, kitchen scraps (veg and fruit), spent garden plants, manure from herbivores.
- Aim for roughly 2–3 parts browns to 1 part greens by volume. If you like numbers, a target C:N ratio of ~25–30:1 gets you hot compost. Practically, add a layer of browns after each bucket of greens.
Load Bin 1 in layers:
- Start with a coarse “air layer” of sticks or corn stalks on the bottom.
- Add alternating layers of greens and browns 3–6 inches thick. Sprinkle a handful of finished compost or healthy garden soil here and there to inoculate microbes.
- Chop bulky materials. Smaller pieces break down faster. Run leaves over with a mower or tear cardboard by hand.
Moisture: wrung-out sponge
- Water as you build. Each layer should feel like a wrung-out sponge: damp but not dripping. Too dry won’t heat; too wet turns sour.
- In dry climates, cover the top with a tarp or extra browns to reduce evaporation. In wet climates, cover to shed heavy rain.
- Smart pairing: If you capture rain runoff for your garden, you can also use it to moisten your compost. A compact collection setup such as SmartWaterBox helps store clean water you can use for both compost and irrigation.
Air: turn for oxygen
- After a week, check temperature with your hand (feel warm) or a compost thermometer. Hot piles reach 130–160°F within days if balanced and moist.
- When the center cools below ~120°F, fork the contents into Bin 2. This “turn” mixes and reoxygenates the pile, bringing outer materials into the hot center.
- If you prefer minimal labor, do one big turn from Bin 1 to Bin 2 after 2–3 weeks, then let it finish.
Curing:
- After the hot phase (3–6 weeks), the compost looks dark and crumbly but may still be “fresh.” Move it to Bin 3 to cure for another 3–6 weeks. Curing stabilizes nutrients and finishes decomposition.
What not to add:
- Avoid meats, dairy, oils, large bones, pet waste, and diseased plants or invasive weeds with seeds. These cause odors, attract pests, or survive the hot phase.
With this rhythm—build in Bin 1, hot-turn to Bin 2, cure in Bin 3—you’ll have a steady pipeline of finished compost without spending a dime.
How to build a 3-bin compost system for FREE and get fast, hot results
Once your bins are up, a few habits will dramatically speed up composting and improve quality.
Shred and mix
- Chop stems, tear cardboard, and run leaves under a mower. More surface area means faster microbial action.
- Blend materials as you load. Thick mats of grass or leaves can compact and go anaerobic; alternate thin layers and fluff them lightly with a fork.
Optimize heat
- Target a pile at least 3x3x3 feet. Smaller heaps struggle to hold heat, especially in cool weather.
- If your pile is cooling early, add more greens or water lightly and turn to reoxygenate. If it smells sour, add browns and turn.
Simple airflow hacks
- Lay a couple of perforated PVC pipes horizontally inside the pile as you build. You can often find short leftover lengths for free. This boosts airflow without constant turning.
- Use coarse browns at the base and throughout, like shredded sticks or straw.
Manage moisture with what you have
- Use collected rainwater to moisten the pile. Water quality doesn’t need to be pristine; microbes are resilient.
- Too wet? Fork the pile to introduce air and add dry browns like shredded cardboard. Too dry? Water thoroughly during a turn.
Seasonal strategies
- Summer: Piles dry faster—water more frequently and cover lightly.
- Fall: Stockpile leaves in bags or a dedicated cage to use as browns all year.
- Winter: Build larger piles, insulate with extra leaves around the outside, and cover to hold heat. Turning less often is fine; let it “slow cook.”
Integration with your garden
- Top-dress beds with cured compost and cover with mulch to protect soil life.
- Blend compost into potting mixes for seedlings, using a fine-screened portion.
Consistency and record-keeping
- Take quick notes: what you added, how wet it felt, and when you turned. Your local materials and weather define the exact balance that works best.
By pairing these simple practices with your free-built bins, you’ll produce rich, earthy compost quickly. Your soil will thank you with looser structure, better water retention, and more resilient plants—especially when you keep the pipeline moving all year.
Troubleshooting, maintenance, and harvesting
Even a well-built system needs occasional tweaks. Use these quick diagnoses to fix common issues without buying anything.
If it smells bad (sour or rotten):
- Likely too wet or too many greens. Fork it to mix in air and add dry browns (leaves, shredded cardboard). Break up clumps of grass or food scraps.
- Check drainage; lift the bottom with a few sticks if water is pooling.
If it’s dry and not heating:
- Add water until it feels like a wrung-out sponge. Mix in more greens (coffee grounds, fresh clippings). Cover to reduce evaporation.
If it’s not heating but is damp:
- The pile may be too small or mostly browns. Add greens and turn thoroughly, or consolidate two bins’ worth into one to increase mass.
If you see pests:
- Avoid meats, dairy, and oils. Bury kitchen scraps deep under a brown layer.
- Add hardware cloth to the floor and lower sides if rodents are a concern. Keep the area tidy and remove fallen food nearby.
If you see lots of worms and it’s cool:
- That’s fine. Cool, worm-heavy composting is slower but still productive. You’ll get a gentler, fungal-rich compost—great for perennials.
Maintenance tips:
- Inspect fasteners and ties quarterly. Replace broken zip ties or add a screw where needed.
- Keep a stash of browns (bagged leaves are gold) to balance green-heavy weeks.
- Rake up windblown leaves or straw and toss them in—you’re feeding soil for free.
Harvesting finished compost:
- Mature compost is dark, crumbly, and earthy-smelling. Few recognizable pieces remain.
- Use a simple DIY screen (hardware cloth in a wooden frame) over a wheelbarrow to sift. Toss larger bits back into Bin 1 as “inoculant” and structure.
- Apply 1–2 inches on beds in spring and fall; top-dress perennials; blend into planting holes. Mulch over it to protect soil life.
Storage:
- If you make more than you need now, store cured compost under a tarp to keep it from drying and eroding. Moist, covered piles stay biologically active.
Long-term durability:
- Pallets exposed to weather will eventually decay. That’s okay: your bin becomes compost too. Replace a side or front slat as needed from your stash of extras.
With quick, periodic checks and timely turns, your three-bin setup will run for years with almost no cost.
Helpful self-reliance resources that pair well with composting
- The Lost SuperFoods: A practical collection of long-lasting food ideas and preservation approaches that help you stock a resilient pantry while you grow garden abundance.
- SmartWaterBox: A compact water capture and storage approach for gardens and compost—use rain to moisten piles and irrigate beds during dry spells.
- URBAN Survival Code: Strategies for tight spaces and city living that dovetail with compact composting and balcony or micro-garden setups.
- Home Doctor: General home first-aid and self-reliance guidance; useful when you spend long days gardening and doing DIY projects.
Urban, suburban, and rural adaptations for your free three-bin build
Your location changes how you source materials and where you place the system, but the core principles stay the same.
Urban adaptations:
- Footprint: Use narrower pallets or cut them down to make 3x3x3-foot bins. Even 3x3x2.5 feet can work in tight spaces.
- Appearance: Paint or stain the exterior side of pallets with leftover water-based paint for a tidy look. Add a slatted screen in front if you need to hide the bins from view.
- Pest-proofing: Hardware cloth floors and tight-fitting fronts are essential. Avoid open food scraps; bury kitchen waste under browns.
- Community inputs: Ask coffee shops for spent grounds, neighbors for bagged leaves, and local parks for wood chips.
Suburban considerations:
- HOA rules: Check setback distances and screening requirements. Plant ornamental grasses or shrubs to screen the bins if needed.
- Noise and timing: Turn piles during daylight hours and on yard-work days to keep neighbors happy.
- Aesthetic upgrades: Cap the front slats with a single straight board for a finished look. Use matching hinges and latches from a used hardware store.
Rural flexibility:
- Scale up: If you have livestock or larger gardens, lengthen the system with an extra bin or two. Still free, just more pallets.
- Manure management: Mix bedding/manure with plenty of browns to prevent odors and accelerate heating. Hot composting helps reduce pathogens from herbivore manure.
- Equipment: If you use a tractor bucket, design larger, sturdier fronts to handle the load.
Weather-specific tweaks:
- Wet climates: Add roofs or hinged lids from corrugated panels to keep piles from waterlogging. Ensure good drainage beneath.
- Dry climates: Build windbreaks using pallets or plant hedges to reduce drying. Store browns under cover to keep them from crisping.
- Cold climates: Build bigger piles in fall, insulate sides with bagged leaves, and minimize turning in deep winter.
Sourcing tips by region:
- Industrial areas: Abundant pallets; ask politely and choose safe, heat-treated ones.
- Agricultural zones: Old fencing, posts, and wire are common; check farm swap groups.
- Coastal towns: Salt-spray on materials is fine for structure but avoid adding salty seaweed without rinsing if your soil is salt-sensitive.
No matter where you live, let your site and salvaged materials shape the final design. The best compost system is the one you can build today and keep using weekly.
How to build a 3-bin compost system for FREE and keep it thriving year-round
A thriving compost system is a habit more than a project. Here’s how to keep momentum without spending money.
Make feeding easy:
- Keep a small, lidded bucket for kitchen scraps and empty it into Bin 1 every day or two. Cover each addition with a scoop of browns.
- Place a leaf corral or brown-material bin nearby so you never run short on carbon.
Turn on a schedule:
- Pick a “turn day” every 1–2 weeks. Mark it on your calendar. On that day, move Bin 1 into Bin 2 if it’s heating, or just fork and fluff it if you’re still building volume.
- When Bin 2 cools and looks dark and crumbly, shift it to Bin 3 to cure.
Keep moisture steady:
- Do a quick squeeze test whenever you add material. If it’s dry to the touch, sprinkle water as you layer. If it smears and drips, mix in shredded cardboard or leaves.
- In droughts, plan for efficient water use: moisten only on turn days and cover with a tarp to hold humidity. Again, a compact rain capture setup like SmartWaterBox can make this effortless.
Use free “boosters” wisely:
- Coffee grounds are nitrogen-rich and available free from cafes. Mix thinly; too many can clump.
- Seaweed (rinsed) adds trace minerals. Leaves are your year-round carbon backbone—collect them in fall like treasure.
Leverage community:
- Swap: Offer finished compost or seedlings for neighbors’ bagged leaves.
- Local groups: Post in community forums for free materials—“Wanted: pallets, leaves, grass clippings (no herbicides), cardboard.”
Be mindful of herbicides:
- Some lawn clippings or hay/straw can contain persistent herbicides that survive composting and harm broadleaf plants. If uncertain, compost a small batch and test on a few bean seedlings before using widely.
Harvest with intention:
- Sift a portion for seed-starting mixes; reserve chunkier compost for bed mulching.
- Blend compost into pathways under wood chips to build soil even where you walk.
Safety and care:
- Lift with your legs, not your back. Use a digging fork instead of a shovel for easier turning.
- Wear gloves; wash hands after handling compost and before eating.
With these habits, your system becomes a weekly rhythm. The bins you built for free will pay you back every season with rich, living compost that keeps your soil thriving.
Build broader resilience at home
Your compost system is foundational self-reliance—you’re transforming waste into fertility. If you want to take the next step and strengthen your overall preparedness and urban-friendly strategies, consider URBAN Survival Code for practical, compact solutions to tight spaces and city constraints. It pairs naturally with balcony gardens, container composting, and smart storage for tools and supplies. For kitchen self-sufficiency that complements a steady inflow of garden produce, The Lost SuperFoods offers ideas that reduce waste and stretch harvests. And for hydration and garden care through dry spells, storing clean rainwater with SmartWaterBox makes compost moisture and irrigation simple. For general home self-reliance and first-aid awareness during long gardening days, Home Doctor is a helpful resource.
Use these tools selectively—your compost system remains the heart of a regenerative home.
Conclusion
When you know how to build a 3-bin compost system for FREE, you unlock a steady stream of nutrient-rich compost without ongoing costs. Pallets and scrap materials become a sturdy, modular setup that’s easy to turn, fast to heat, and simple to maintain. With the right balance of browns and greens, consistent moisture, and periodic turning, your three bins transform kitchen and yard waste into living soil food all year.
Start with a clear plan, scavenge safe materials, and build a functional layout that fits your space. Load Bin 1 with balanced layers, turn into Bin 2 to reoxygenate and speed hot composting, then cure in Bin 3 for a stable, plant-ready amendment. Troubleshoot with simple, free fixes and adapt the system to your climate and neighborhood. Over time, your soil will hold more water, resist disease and stress, and reward you with bigger, healthier harvests—proof that the best garden upgrades are often built from what you already have.
FAQ
What’s the ideal size for each bin in a free three-bin system?
Aim for 3–4 feet wide, 3–4 feet deep, and at least 3 feet tall. That volume retains heat for thermophilic composting. Standard 40×48-inch pallets make this easy.
Can I use pressure-treated wood to build a 3-bin compost system for FREE?
Avoid older pressure-treated wood (pre-2004) due to arsenic. Heat-treated pallets (stamped “HT”) are generally safe. If you must use newer treated lumber for structure, line the inside with plastic or cardboard as a barrier and avoid direct contact with compost.
How often should I turn the pile in a three-bin setup?
Turn when the center cools below about 120°F or after 1–2 weeks in warm weather. Move Bin 1 into Bin 2 for the active hot phase, then to Bin 3 for curing. Minimalists can do one big turn and let it finish.
What free materials can I use for browns and greens?
Browns: bagged leaves, shredded cardboard, paper, straw, sawdust (untreated), dried plant stems. Greens: coffee grounds, kitchen scraps (veg/fruit), fresh grass, spent garden plants, manure from herbivores. Keep meats, dairy, and oils out.
How do I keep rodents out of my bins?
Line the floor with hardware cloth and secure the lower sides with wire mesh. Bury food scraps under browns, keep fronts snug, and keep the area tidy. Avoid adding foods that attract pests.