
Healthy soil is the foundation of a thriving garden—and the easiest, most affordable way to build it is by composting at home. This practical, zero-waste approach transforms kitchen scraps and yard waste into nutrient-rich compost that boosts plant health, increases water retention, and reduces your trash. In this How to Build a Compost Bin: Step-by-Step Guide, you’ll learn exactly what to build, how to build it safely, and how to run your bin like a pro for consistent, crumbly compost.
If you’re also planning water capture or irrigation to keep your compost and garden evenly moist, a resource like SmartWaterBox can help you design a simple, resilient water setup that pairs nicely with composting.
Table of Contents
Choose your method before you build a compost bin
Before you pick up tools, decide which composting approach fits your space, budget, and goals. Your choice determines materials, build time, and ongoing effort.
Stationary bins (best for yards)
- Single-bin wooden or wire structures are affordable and easy to scale.
- Pros: Inexpensive, high capacity, flexible to build.
- Cons: Turning by hand, slower if you don’t manage air and moisture.
Multi-bin systems (best for avid gardeners)
- Two- or three-bin setups let you fill one bin while another cures.
- Pros: Efficient workflow, steady compost output.
- Cons: Requires more space and materials.
Wire-circle bins (best for fast, budget builds)
- A roll of wire mesh forms a quick, breathable bin.
- Pros: Ultra-fast to build, good airflow.
- Cons: Less sturdy, can look rustic, may need anchoring.
DIY tumbler (best for small yards)
- A drilled plastic barrel or trash can you roll or spin to aerate.
- Pros: Faster breakdown with regular turning, pest resistant.
- Cons: Lower capacity, requires periodic spinning.
Urban/compact options
- Balcony-friendly choices include a sealed, drilled tote for aerobic compost, or a small tumbler.
- Pros: Minimal footprint, odor control.
- Cons: Limited volume; you’ll need to be precise with carbon/nitrogen balance.
Site selection matters as much as the bin design:
- Place the bin on bare soil when possible to encourage earthworm access and drainage.
- Pick a level, shaded-to-partly shaded spot to stabilize moisture and temperature.
- Keep the bin accessible to your kitchen door and garden beds—convenience reduces the temptation to skip feedings or turning.
- Avoid placing bins right against wooden fences or structures; allow airflow and easy maintenance.
- If rodents are a concern, line the base with 1/4-inch hardware cloth and secure the sides with tight-fitting lids or panels.
Your climate also guides the ideal bin:
- Dry climates benefit from covered bins, thicker walls, and moisture-retentive materials (like straw and shredded cardboard).
- Rainy climates need lids and good drainage to prevent soggy piles.
- Cold climates benefit from larger, well-insulated bins that hold heat longer.
With your method, location, and climate in mind, you’re ready to gather materials.
Materials and tools to build a compost bin
You can build a compost bin with a modest tool set and readily available materials. Choose durable, breathable materials and aim for at least 3x3x3 feet (about 1 cubic yard) of capacity for a faster, hot composting process.
Common materials
- Wood: Untreated or naturally rot-resistant (cedar, redwood), or modern ACQ-treated lumber used with a plastic or landscape fabric liner to reduce soil contact. Avoid old wood treated with unknown chemicals.
- Wooden pallets: Look for “HT” stamps (heat-treated) rather than chemical-treated. Pallets make sturdy, low-cost walls.
- Wire mesh or fencing: 14-gauge welded wire or heavy-duty poultry netting; 1- to 2-inch openings for walls, 1/4-inch hardware cloth for rodent-proofing.
- Fasteners: Exterior-grade screws, zip ties, or galvanized wire for joining panels.
- Hinges and latches: Useful for a front gate or lid on wooden bins.
- Plastic barrel/trash can: Heavy-duty, food-grade barrel or a rigid trash can with tight lid for a budget tumbler.
- Landscape fabric or geotextile: Optional liners for wooden bins to protect wood and improve airflow while reducing fines spilling out.
- Bricks or pavers: For leveling feet or elevating a bin base for drainage.
- Roofing material: Scrap plywood with shingles, corrugated metal, or polycarbonate panels to form a weather-resistant lid.
Basic tool list
- Measuring tape and carpenter’s square
- Hand saw or circular saw
- Drill/driver and drill bits
- Tin snips or bolt cutters (for wire mesh)
- Staple gun or fencing staples for fabric liners
- Safety gear: gloves, safety glasses, dust mask when cutting or sanding
- Shovel and garden fork for loading, turning, and harvesting compost
Size and capacity guidelines
- A single-bin system: 3x3x3 feet minimum is ideal. Larger is fine, but ensure you can reach and turn materials.
- Multi-bin system: Three bays of roughly 3x3x3 feet each let you actively compost in one bin, transfer to the second for finishing, and store finished compost in the third.
- Wire-circle bin: Aim for a 10–12-foot length of wire fence formed into a 3–4-foot diameter circle; height of 3–4 feet.
- Tumbler/barrel: 30–55 gallons is manageable for manual spinning and suitable for small households.
Sustainability and safety notes
- Upcycle materials where possible, but prioritize clean, safe components—no mystery chemicals, painted lumber with peeling coatings, or corroded metal.
- If using pallets, sand rough edges, check for protruding nails, and cap sharp corners for safety.
- Consider aesthetics: a simple coat of eco-friendly exterior finish on the outside (never on internal compost-contact surfaces) helps a wooden bin blend into your yard.
Step-by-step: How to build a compost bin (3 DIY plans)
Below are three reliable designs that balance simplicity, cost, and performance. Pick one and follow it through, or mix elements to match your needs.
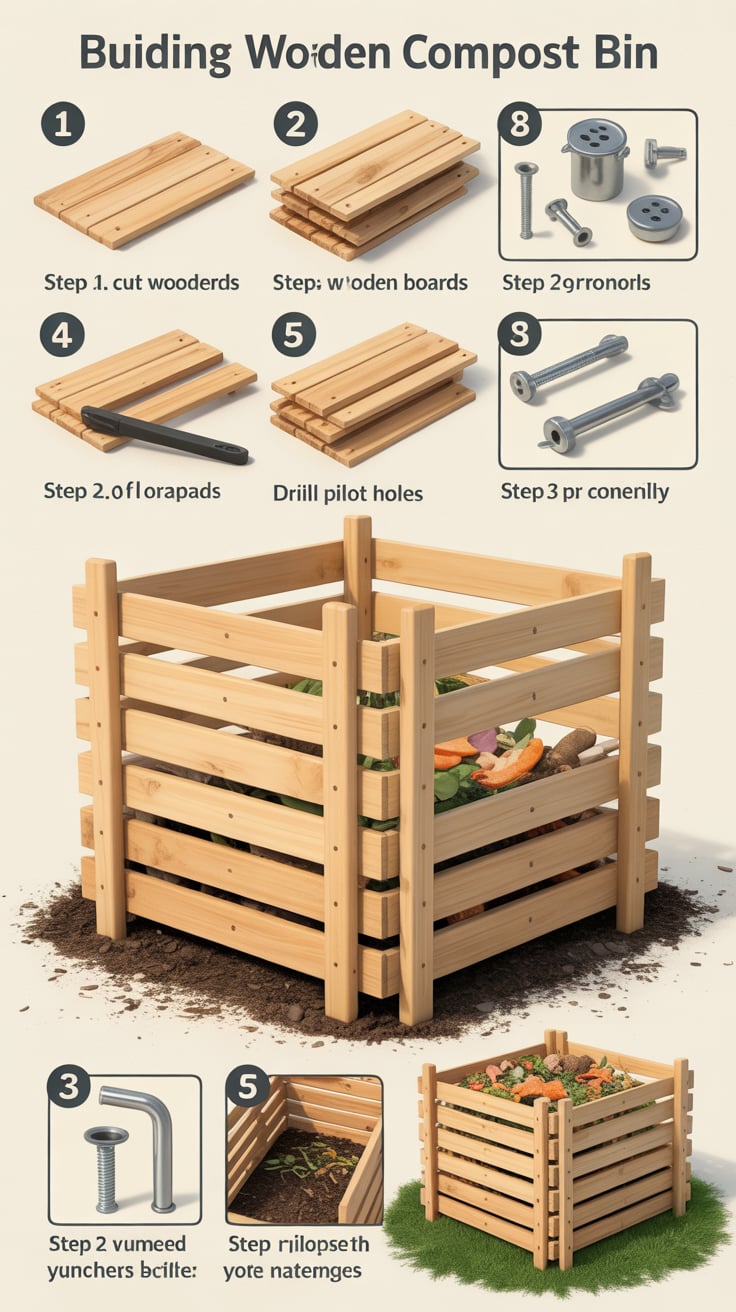
Plan A: Pallet-sided single bin
Materials: four heat-treated pallets, exterior screws or heavy-duty zip ties, optional hinges and latch for a front access door, and hardware cloth for base if rodents are an issue.
- Prepare the base: Level the ground. If rodents are common, lay 1/4-inch hardware cloth and pin it with garden staples or bricks.
- Assemble the walls: Stand three pallets upright to form the back and sides. Secure at the corners using screws through pre-drilled pilot holes, metal brackets, or zip ties.
- Add the front: For easy access, attach a fourth pallet with hinges as a gate, or cut the pallet into slats and screw them across vertical battens to create a removable front panel. Leave 1/2- to 1-inch gaps for airflow.
- Optional lining: Staple landscape fabric on the inside to reduce spilling while keeping airflow.
- Top cover: Build a simple lid from plywood with roofing or corrugated plastic. Hinge it to the back pallet and add a prop stick, or use a removable cover weighted with bricks.
- Finishing touches: Round off rough edges, pre-drill and reinforce weak joints, and add a latch or bungee to keep the lid down in wind.
Plan B: Wire-circle bin
Materials: 10–12 feet of welded wire fencing (3–4 feet tall), heavy-duty zip ties or wire, and stakes.
- Shape the cylinder: Roll the fencing into a circle and overlap the ends by a few squares. Tie with zip ties or wire every 4–6 inches.
- Place and secure: Set the bin on level soil. Anchor with two or three stakes woven through the mesh and driven into the ground.
- Rodent protection: If needed, place hardware cloth under the circle before filling.
- Lid or cover: Use a round of rigid mesh, a scrap of corrugated plastic, or a tarp clipped to the mesh to reduce excess rain and keep animals out.
- Advantage: Tons of airflow; excellent for leaf-heavy piles that compact less.
Plan C: DIY barrel or trash-can tumbler
Materials: 30–55 gallon rigid plastic barrel or trash can with tight lid; 1/2-inch drill bit; optional axle/stand.
- Drill aeration holes: Mark and drill 1/2-inch holes evenly around the sides and bottom every 4–6 inches to allow airflow and drainage.
- Add handles: Bolt on sturdy handles to aid rolling, or mount on a simple wooden cradle with pipe axles for spinning.
- Secure the lid: Use bungee cords or lockable latches to keep the lid shut during rotation.
- For rolling: Fill to no more than two-thirds capacity so the material can tumble freely.
- For stand mount: Build an A-frame or box stand from 2x4s, insert a metal or PVC axle through the barrel, and rest the axle in notches on the stand. Label a marker line on the barrel to track turns.
All three designs benefit from:
- Easy access for turning and harvesting
- Adequate airflow (through slats, mesh, or drilled holes)
- Weather protection (a lid or cover to moderate moisture)
By choosing one of these builds, you’ll have a reliable foundation for steady composting at home.
Master the composting process — browns, greens, air, and moisture
A durable bin is half the equation. The other half is understanding how composting works so your bin runs hot, odor-free, and fast.
Core principles
- Balance carbon and nitrogen: Browns (carbon) include dry leaves, straw, shredded cardboard, wood chips, and paper. Greens (nitrogen) include fresh grass clippings, kitchen scraps, coffee grounds, and plant trimmings.
- Target ratio: About 2–3 parts browns to 1 part greens by loose volume tends to yield a healthy 25–30:1 carbon-to-nitrogen ratio.
- Particle size: Chop materials into fist-sized pieces or smaller to speed decomposition.
- Moisture: Aim for “wrung-out sponge” dampness. Too dry? Add water or more greens. Too wet? Add browns and mix.
- Airflow: Oxygen powers decomposition. Build in airflow via slats or holes, and turn materials periodically.
Layering and mixing
- Start with a 4–6 inch base layer of coarse browns (twigs, straw, wood chips) to improve airflow and drainage.
- Alternate layers: 2–4 inches of greens, then 4–6 inches of browns. Lightly mix with a fork to avoid compacted layers.
- Add a handful of finished compost or garden soil occasionally to inoculate microbes.
- Avoid meat, fish, dairy, oily foods, and large amounts of baked goods, which attract pests and slow the process.
Heating and turning
- A well-built pile reaches 130–160°F in a few days to weeks, killing many weed seeds and pathogens.
- Turn or fork the pile every 1–2 weeks to maintain airflow, or spin a tumbler every 2–3 days.
- If heat drops early, check moisture and the brown/green balance; add shredded browns if wet and clumpy, or more greens if the pile is dry and inactive.
Odor and pest prevention
- Odor usually signals excess moisture or too much nitrogen. Remedy with more shredded leaves or cardboard and a thorough mix.
- Always cover fresh kitchen scraps with a 2–3 inch cap of browns.
- Use a tight lid, hardware cloth, and clean inputs to deter pests. In urban areas, a tumbler or sealed wooden bin with fine mesh is best.
Seasonal adjustments
- Winter: Insulate with extra browns and a lid; reduce turning to preserve heat. Bigger piles hold heat longer.
- Summer: Shade the bin, monitor moisture more often, and cover to reduce heavy rain saturation.
Master these fundamentals, and your bin will reliably produce dark, crumbly compost.
Daily and seasonal operation for a trouble-free bin
Operating your bin well is nearly as important as building it. Adopt a simple routine and adapt to the weather to maintain momentum.
Simple weekly routine
- Collect scraps: Keep a tight-lidded pail in the kitchen for fruit/veg scraps, coffee grounds, eggshells (crushed), and tea leaves.
- Chop and feed: Cut larger scraps; sprinkle into the bin, then cover with browns. Small, frequent additions keep microbes fed.
- Turn and check: Once a week (or per your design), aerate with a garden fork or spin your tumbler. Check moisture and add water if materials are dry and dusty.
Troubleshooting quick hits
- Pile too wet/slimy: Add shredded cardboard or leaves, mix thoroughly, and ensure the lid sheds rain.
- Pile too dry and slow: Water while turning, add a batch of fresh greens, and cover to retain moisture.
- Ammonia smell: Too much nitrogen; add browns and turn. Ensure adequate bin ventilation.
- Fruit flies: Always cap kitchen scraps with browns, and avoid adding too much fruit at once.
Cold and hot weather tips
- Cold climates: Build larger piles, insulate with straw bales on the sides, and limit turning to conserve heat. Feed in larger batches to spark a hot cycle.
- Hot/dry climates: Water lightly during turnings; add moisture-holding browns like shredded cardboard; provide afternoon shade.
- Rainy climates: Use a fitted lid and raised base; add extra browns to counter excess moisture.
Harvesting and curing
- When the pile stops heating and materials are mostly unrecognizable, let it cure for 3–6 weeks with minimal turning.
- Test for readiness: Finished compost is dark, crumbly, earthy smelling, and doesn’t reheat after turning.
- Sift through 1/2-inch mesh to separate oversize bits; return the leftovers to the bin as “compost kickstarter.”
Apartment and small-space strategies
- Use a sealed, drilled tote or a compact tumbler to control odor and pests.
- Choose carbon-rich bedding like shredded paper and leaves to balance kitchen scraps.
- Keep volumes modest to avoid souring the mix.
If you’re optimizing a resilient apartment setup and want broader urban preparedness strategies that pair well with compact composting, explore URBAN Survival Code for planning beyond the garden.
Upgrades that make your bin last longer and work better
Once your basic bin is running, small upgrades can boost durability, airflow, and ease of use.
Structural upgrades
- Front access slats: Install removable horizontal slats on the front of a wooden bin for easy turning and harvesting. Slot them into vertical guides made from ripped 2x4s.
- Corner posts: Use 4×4 posts for corners to stiffen walls on multi-bin systems. Lag bolt panels for strength.
- Rodent armor: Wrap the inside lower 12 inches of wooden bins with 1/4-inch hardware cloth, including the floor if needed.
- Weatherproof lid: A hinged, counterweighted lid with a simple prop rod or chain makes frequent checks easier. Add drip edges or flashing to shed rain.
Air and moisture control
- Vent slats: Aim for 1/2- to 1-inch gaps between wooden boards. Too tight and the pile may go anaerobic; too open and materials dry out quickly.
- Chimney effect: In a large bin, a vertical perforated PVC pipe inserted down the center helps airflow without constant turning.
- Moisture meter: A basic soil moisture meter helps verify “wrung-out sponge” levels. Alternatively, do a squeeze test: squeeze a handful—one or two drops is perfect.
Multi-bin workflow
- Three-bin system:
- Bin 1: Active build. Feed and turn weekly.
- Bin 2: Transition/finish. Turn every 2–3 weeks; no new scraps.
- Bin 3: Finished storage. Keep covered and dry until use.
- Label bins and dates: A simple marker board keeps you on schedule.
Aesthetics and neighbors
- Add a trellis: Train vining ornamentals on the bin’s sunny side to soften the look.
- Paint only the outside: Use low-VOC exterior paint on non-contact surfaces to match your landscape.
Water synergy
- Place a rain barrel near the bin for convenient, chlorine-free water. Rainwater tends to support microbial life well.
- Store a bin of shredded leaves or cardboard under cover; it keeps your carbon dry and ready to cap wet inputs.
- If you’re building a broader water plan for the garden and compost, a guide like SmartWaterBox can help you integrate simple capture and storage into your routine without overcomplicating your setup.
Safety and hygiene
- Wear gloves when turning piles and wash hands afterward.
- Keep pet waste, diseased plant material, and glossy/colored papers out of the bin.
- Maintain tidy edges and clear paths to avoid trips when hauling materials.
These upgrades make routine maintenance faster, meaning you’ll actually do it—and that’s what keeps compost quality high.
Materials you can and cannot add for a healthy compost bin
Knowing what to feed your bin prevents odors, pests, and imbalances. Keep a short list posted near the bin for quick reference.
Great browns (carbon)
- Dry leaves, straw, shredded cardboard (plain), paper towels/napkins (food-soiled is fine), sawdust from untreated wood, wood chips, twigs
Great greens (nitrogen)
- Vegetable and fruit scraps, coffee grounds and filters, tea leaves, green plant trimmings, fresh grass clippings, spent garden plants (seed-free)
OK in moderation
- Eggshells (crushed for faster breakdown), bread/pasta (small amounts only, well-buried), hair and fur
Avoid or handle with caution
- Meat, fish, dairy, oily foods: attract pests; better avoided in open bins
- Pet waste (cats/dogs), diapers: pathogens risk
- Diseased plants, mature weed seeds: can survive if pile doesn’t get hot enough
- Glossy/coated paper, colored inks, pressure-treated sawdust, coal ash: chemical concerns
- Large branches: compost too slowly; chip first if you want to add them
Pro tips
- Keep a lidded “browns” tote beside the bin so you can cap every addition of kitchen scraps immediately.
- If you’re running a tumbler, chop materials smaller and avoid long fibrous stems that ball up.
Put your compost to work in the garden
Once you’ve learned how to build a compost bin and run it well, the payoff is in how you use the finished product. Proper application saves money on fertilizers and improves soil for years.
How to know it’s ready
- Color and texture: Dark brown to black, crumbly, and uniform.
- Smell: Earthy and pleasant, not sour or ammonia-like.
- Heat test: No reheat after turning, and the center feels ambient.
Ways to use finished compost
- Garden beds: Spread 1–2 inches on top of soil and lightly fork in before planting. For heavy feeders (tomatoes, squash, brassicas), mix a bit deeper into planting holes.
- Top-dressing perennials: Apply 1 inch around drip lines, then mulch.
- Lawn: Sift and spread a thin 1/4-inch layer as a top-dress in spring or fall, followed by watering.
- Potting mixes: Combine 20–30% screened compost with high-quality peat-free mix and perlite for container gardens.
- Compost tea (aerated or simple steep): Use mature compost to brew gentle liquid feeds; strain well before applying to avoid clogging sprayers.
Boosting garden resilience
- Compost increases water-holding capacity and improves soil structure. That means less watering, fewer soil crusting issues, and better root growth.
- Planning a high-yield, resilient garden that complements your compost-driven soil building? A guide like The Lost SuperFoods can inspire crop choices and pantry strategies that pair well with nutrient-dense, compost-supported harvests.
Hygiene and safety when applying
- Wear gloves, especially if you’re immunocompromised.
- Keep compost off edible leaves close to harvest; apply as a soil amendment rather than a fresh mulch on salad greens.
- Consider general home health knowledge to stay prepared while doing DIY projects around the house—resources like Home Doctor offer practical, household-level guidance that complements self-reliant gardening.
Recommended resources for resilient composting and gardening
- Water setup for gardens and compost: SmartWaterBox
- Urban preparedness planning that fits small-space composting: URBAN Survival Code
- Pantry resilience and crop ideas for nutrient-dense gardens: The Lost SuperFoods
- Practical household health know-how for DIY living: Home Doctor
Conclusion: How to build a compost bin that pays you back
With the right design, materials, and operating habits, a home compost bin turns everyday waste into a steady stream of soil-building goodness. You’ve seen how to build a compost bin—from choosing between pallets, wire, or a tumbler, to dialing in browns and greens, solving common problems, and using the finished product to power your garden. Start simple, keep a stock of dry “browns” on hand, and make weekly check-ins a habit. Your plants, soil, and water bill will thank you. If you’re expanding your self-reliant setup, consider helpful companions like SmartWaterBox for moisture management, URBAN Survival Code for small-space planning, and The Lost SuperFoods for resilient pantry ideas.
Frequently asked questions
What’s the fastest way to start if I’m new to composting?
Build a simple wire-circle bin or a pallet bin, collect a bag of dry leaves and a bucket of kitchen scraps, and alternate layers. Keep it moist like a wrung-out sponge and turn weekly. Tumblers can be quick if you spin them consistently.
How to build a compost bin for a small backyard or patio?
A drilled, lidded trash can or a compact tumbler is ideal. Keep volumes modest, chop scraps small, and cap every addition with shredded cardboard or leaves to control odor and moisture.
What size should my compost bin be?
Aim for at least 3x3x3 feet for hot composting. Smaller bins can work but may run cooler and slower; compensate with more frequent turning, precise moisture control, and smaller particle size.
What should I never put in my compost bin?
Avoid meat, fish, dairy, oily foods, pet waste, diseased plants, and glossy or coated paper. These can cause odors, attract pests, or introduce pathogens and chemicals.
How do I know my compost is finished and safe to use?
Mature compost is dark, crumbly, and smells earthy. It no longer heats up after turning and passes a squeeze test without releasing free water. Cure for a few weeks before using, then apply as a 1–2 inch bed amendment or a thin lawn top-dress.
Can I compost in winter?
Yes. Build a larger pile, insulate with straw bales, keep it covered, and reduce turning. Even if it cools, it will restart in spring; continue adding browns and small amounts of greens.
How to build a compost bin that keeps rodents out?
Line the base and the bottom foot of the walls with 1/4-inch hardware cloth, use a snug lid, avoid meat and oily foods, and cap all fresh scraps with dry browns. Tumblers offer excellent rodent resistance.