
Turning kitchen scraps and yard trimmings into rich, dark soil doesn’t have to mean hours of turning a steaming pile. If you’ve ever wondered how to make compost the easy way, you’re in the right place. This guide walks you through low-effort, high-reward methods tailored for busy gardeners and first-timers. You’ll learn simple compost recipes, what to add (and avoid), no-turn techniques, and how to troubleshoot common issues without breaking a sweat.
If you’re building a resilient garden setup that pairs nicely with home composting, you might also explore Aqua Tower as a complementary resource for growing more with less space and effort.
Table of Contents
Choose a low-effort composting method that fits your space
The “easy way” to compost isn’t one single method—it’s the one that matches your time, space, and climate. Pick the style you can actually stick with and everything else gets simpler.
Cold composting (set-and-forget): This is the most forgiving approach. Pile up a mix of “browns” (dry leaves, shredded cardboard) and “greens” (food scraps, grass clippings), keep it damp like a wrung-out sponge, and cover it with browns after each addition. It decomposes slowly over months with minimal intervention. Ideal if you don’t need compost fast and you prefer low maintenance over speed.
No-turn, aerated static pile: Build a freestanding pile or use a simple bin or wire cage. Create air channels with coarse sticks at the bottom or insert a few perforated pipes vertically. Layer greens and browns as they come. The internal airflow reduces the need for turning. This is a great balance of simplicity and reliability.
Compost tumbler: If you want something tidier and faster without a pitchfork, a tumbler keeps materials contained, deters pests, and makes occasional mixing easy—just give it a few spins weekly. Tumblers can run hot with the right mix and moisture, but make sure to fill to the manufacturer’s recommended level and resist overloading.
Trench or in-situ composting: Dig a shallow trench in a fallow bed, add kitchen scraps with a little brown material, and cover with soil. Microbes and earthworms do the rest. This is nearly effortless and feeds garden beds directly, but avoid putting fresh scraps near roots of actively growing crops to reduce pest interest.
Leaf mold bin: If your main “waste” is autumn leaves, pile them in a wire bin, moisten, and leave for 6–12 months. Leaf mold is incredibly water-retentive and boosts soil structure. It’s easy, slow, and nearly foolproof.
Worm composting (vermicompost): Keep a small worm bin (indoor or on a balcony). Red wigglers transform kitchen scraps into high-quality vermicast. No turning, minimal odor when done right, and perfect for apartments. The main job is balancing bedding (shredded paper/cardboard) with food and keeping it moist—not wet.
Tip: Whatever method you choose, give yourself an easy path to success. A covered bin or pile near your kitchen door or garden gate makes regular additions frictionless. A lid or tarp helps manage moisture and odors. A small countertop caddy for scraps reduces trips outside and encourages consistency.
Ingredients and ratios that work without fuss
You’ll often hear about the carbon-to-nitrogen balance. In practice, the easy way is to think “browns vs. greens” and aim for roughly 2–3 parts browns to 1 part greens by volume. This flexible ratio keeps smells down, supports airflow, and helps the pile heat up without turning into sludge.
- Browns (carbon-rich, dry): Dry leaves, straw, shredded paper/cardboard (non-glossy), paper egg cartons, sawdust from untreated wood, wood chips in moderation.
- Greens (nitrogen-rich, moist): Fruit and vegetable scraps, coffee grounds and filters, tea leaves and paper tea bags (without plastic mesh), fresh grass clippings in thin layers, spent garden plants (disease-free), manure from herbivores (aging/composting still required).
What to avoid or limit:
- Meat, fish, dairy, and greasy foods: These can attract pests and cause odors in simple backyard systems.
- Diseased plants or heavily seedy weeds: Unless your pile runs consistently hot, skip these. If in doubt, solarize or dispose safely.
- Glossy or plastic-coated paper, synthetic fibers, or anything treated with persistent chemicals.
- Large wood chunks: They’re slow to break down. Use small amounts or dedicate them to a separate slow-compost area.
- Ash: Wood ash is alkaline and best used sparingly. Skip coal ash entirely.
Simple “success signals” to watch:
- Texture: Your mix should look like a layered salad—dry, fluffy browns surrounding moist, chopped greens.
- Moisture: Aim for a wrung-out sponge feel. Too dry and decomposition stalls; too wet and it gets smelly.
- Volume: A minimal critical mass (around a 3x3x3-foot pile or full tumbler) helps heat build, but you can still compost slowly in smaller bins; it just won’t run as hot.
Pro tip: Keep a bin or bag of browns next to your compost. Every time you add a kitchen pail of greens, add roughly two pails of browns. This one habit prevents 90% of beginner problems.
Layering and building the pile with minimal effort
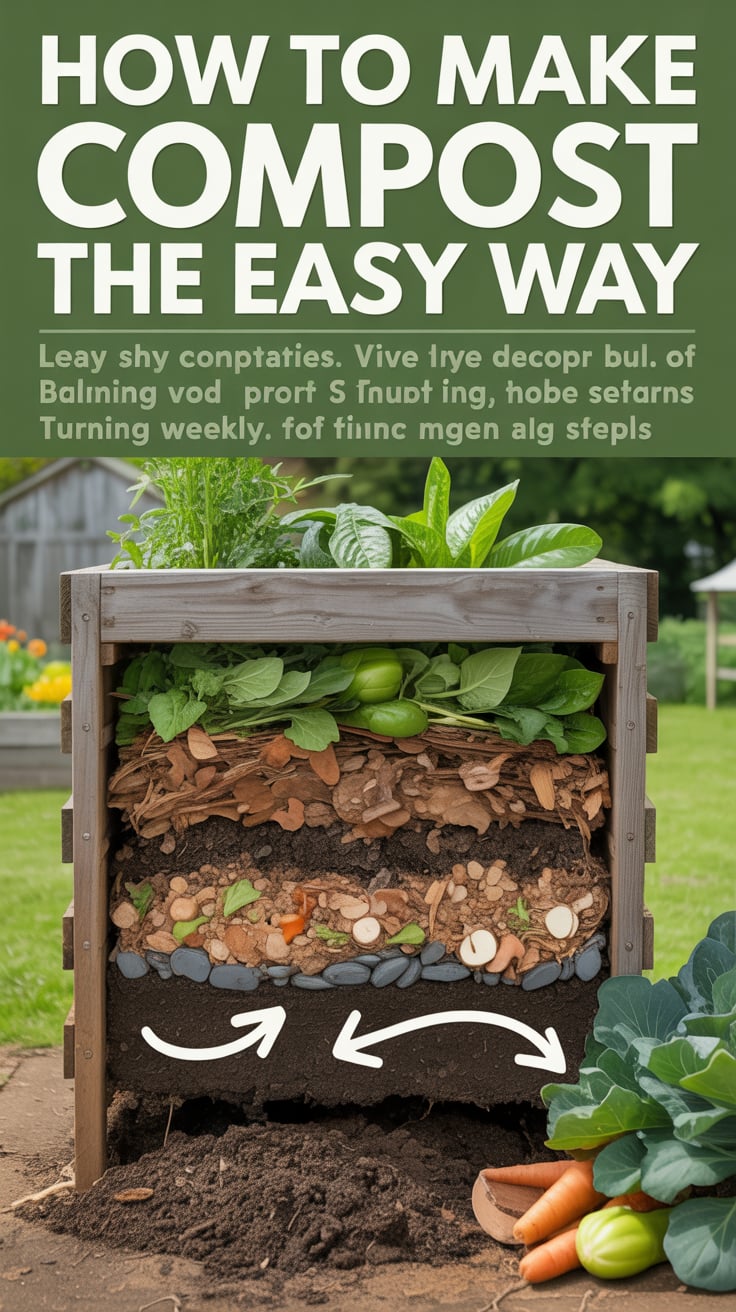
Layering is the low-effort “recipe” that delivers results without constant attention. Think lasagna: browns, greens, repeat—finishing with a brown layer on top.
- Start with airflow: Lay down a fluffy base of sticks, coarse stems, or corncobs to lift the pile and create air pockets. In a tumbler, just avoid packing too dense; in a static bin, consider a 3–4-inch coarse layer.
- Add browns, then greens: For each bucket of kitchen scraps or fresh yard waste, add 2–3 buckets of browns. Spread greens thinly so they don’t mat. Fresh grass clippings should be sprinkled in thin layers or mixed well with browns.
- Cap with browns: A final layer of shredded leaves or cardboard helps deter fruit flies, reduces smells, and absorbs extra moisture.
- Adjust moisture: If materials feel dry, water lightly while building. If you squeeze a handful and get only a drop or two, you’re in the sweet spot.
- Build in batches or gradually: A batch-built pile tends to heat more uniformly, while “as-you-go” piles are more convenient. Both work. The key is consistent browns.
- Chop to speed, but don’t stress: Smaller pieces decompose faster. A quick rough chop with a trowel or shears is enough. For woody stems, break or cut to shorten fibers.
- Cover and protect: A rigid lid, tarp, or thick brown cap protects from heavy rain (which can waterlog the pile) and from summer sun (which can dry it out). In snowy climates, covering also makes winter composting feasible.
When layering in small spaces:
- Use tall, narrow bins, add browns with every deposit, and keep a snug-fitting lid.
- Consider vermicompost: Layer bedding (shredded paper), a thin layer of chopped food scraps, and a light brown cap. Avoid overfeeding—slow and steady wins.
The beauty of layering is that it builds a naturally aerated mass that progresses on its own. You’ll do the occasional check-in for moisture and odors, but you won’t be chained to a pitchfork.
How to make compost the easy way with better airflow and moisture
A little structure goes a long way. With these low-effort upgrades, you can keep the pile breathing and decomposing smoothly.
Air channels without turning: Before building, lay a crisscross of thumb-thick sticks. In larger bins, you can insert two or three upright, perforated PVC tubes or bundles of twigs to act like chimneys. They let oxygen penetrate without you doing manual turning. If the pile subsides, just top with fresh browns.
Minimal mixing options: If you use a tumbler, give it a few spins once or twice a week. If you’re using a static bin, drive a compost aerator tool or a sturdy rod straight down and wiggle in a couple of spots weekly. You’re not “turning”—you’re poking for airflow.
Moisture management: Keep it “wrung-out sponge” moist. In dry climates, cover and water lightly; in rainy periods, beef up your brown cap and cover the pile. If you notice matting or slime, it’s a signal to add more browns and aerate a bit.
Sun, shade, and temperature: In cool climates, placing the bin where it gets some sun helps warm the pile. In hot, dry climates, light shade prevents drying out. Compost doesn’t need to steam to succeed—steady, quiet decomposition still yields great compost.
Keep it clean and contained: A sealed lid on a kitchen caddy prevents fruit flies. Outdoors, a brown cap plus a lid or well-fitted tarp helps deter raccoons and rodents. Hardware cloth under raised bins can block burrowers.
Water is often the limiting factor for a healthy compost system. If you’re working toward water-smart gardening and want a simple way to keep moisture on tap for compost and beds, explore SmartWaterBox. For those building off-grid or backup water resilience that also supports compost and garden care, Joseph’s Well is another resource to consider.
A five-minute weekly check is enough: squeeze a handful to gauge moisture, sniff for sourness (rare if you cap with browns), poke one or two air holes, and walk away. That’s easy composting.
Speeding up results without heavy lifting
If you want compost sooner but still prefer low effort, use these gentle accelerators:
Size matters (a little): Chop citrus peels, corn cobs, and thick stalks into smaller pieces. A few quick snips with pruners cuts decomposition time dramatically.
Balanced feedings: Every kitchen bucket of greens is matched with at least two buckets of browns. This ratio prevents odor and keeps microbes happy and active.
Inoculate with life: A handful of finished compost or plain garden soil sprinkled between layers introduces microbes and grit. No special activators required.
Manage grass clippings: They’re high in nitrogen and moisture. If used in thick mats, they can go slimy. Mix grass with shredded leaves or cardboard so air can circulate.
Warmth and mass: A pile at least knee-high and knee-wide tends to heat more readily. In cool seasons, a dark cover helps capture warmth; in hot seasons, shade helps retain moisture.
Let worms help: In ground-touching bins and trench compost, earthworms will find your pile naturally. In contained systems, consider a simple worm bin—vermicompost is fast, odor-light, and a nutrient powerhouse for seedlings and houseplants.
Bokashi as a pre-step: Bokashi buckets ferment kitchen waste (including small amounts of food you might otherwise avoid) to be trench-composted or added to a larger pile later. It’s not essential, but it’s a tidy indoor step that speeds the overall process when combined with a soil phase.
Keep expectations realistic: “Hot” compost can finish in weeks with frequent turning. The low-effort path is more like a few months for a static pile, or several weeks to a couple of months in an actively managed tumbler. Consistency beats intensity.
What about compost tea? If you experiment with aerated compost extracts, focus on soil drenching rather than foliar sprays for edibles to keep things simple. Your best bet for easy, reliable results is to use finished compost as mulch or topdress—the soil food web will handle the rest.
Troubleshooting made simple
Even the “lazy” method benefits from a little observation. Here’s how to fix common issues fast.
Smelly or slimy pile:
- Likely cause: Too many greens, not enough airflow, or waterlogged.
- Easy fix: Add two or three layers of dry browns, poke a few air holes, and cover. Drain any standing water. Ensure your pile is covered during heavy rain.
Not breaking down:
- Likely cause: Too dry, too many large pieces, or too few greens.
- Easy fix: Moisten lightly while building new layers. Chop or tear large pieces as you add them. Add a small amount of fresh greens or a sprinkle of coffee grounds, then top with browns.
Fruit flies:
- Likely cause: Exposed food scraps.
- Easy fix: Cap each deposit with a 1–2-inch brown layer (shredded leaves or cardboard). Keep a fitted lid on kitchen caddies. Avoid dumping a whole pail of fruit scraps without a brown cap.
Rodents:
- Likely cause: Meat, dairy, or grains in an open bin; easy access under the pile.
- Easy fix: Avoid problem foods in simple backyard systems. Use a sturdy bin with a lid and line the bottom with hardware cloth if needed. Always keep a brown cap on top.
Pile too wet or compacted:
- Likely cause: Heavy rain, too many wet greens, or fine materials like sawdust packed tightly.
- Easy fix: Mix in coarse browns (shredded sticks, chunky leaves), poke airflow holes, and cover. In ongoing rainy periods, build more under cover or in a tumbler.
Pile too dry, not heating:
- Likely cause: Arid climate, lots of dry browns, or wind exposure.
- Easy fix: Water in thin layers as you build; use a dark cover to retain moisture; add a modest amount of greens; keep the pile out of direct wind.
Concern about diseased plants or weed seeds:
- Practical approach: If you can’t guarantee hot temps, skip diseased or heavily seedy material in your main bin. Consider separate solarization or municipal green waste programs for those.
Remember, your nose and hands are your primary tools. If it smells earthy and feels like a wrung-out sponge, you’re on track. If it smells sour or looks shiny and slimy, add browns and airflow.
How to make compost the easy way in any season
Composting becomes effortless when you align it with your seasonal rhythms.
Spring: Abundant greens arrive as you prune and mow. Stock up on browns by shredding last fall’s leaves or collecting cardboard. Start or refresh your pile with a coarse base layer and build alternating layers as yard waste ramps up.
Summer: Heat speeds decomposition but can dry piles out. Keep a cover on to slow evaporation. Sprinkle water lightly when adding fresh layers. Chop and mix small amounts of grass with plenty of browns to avoid matting.
Autumn: Browniest season of the year. Bag and store dry leaves (or keep them in a dedicated bin) to balance kitchen scraps over winter. Leaf mold bins thrive now—just pile, moisten, and cover with a breathable layer.
Winter: Cold slows the process, but you can still add scraps. Keep a brown cap on each deposit and a snug lid. In very cold regions, focus on stockpiling browns, or use vermicomposting indoors for a winter win.
Small-space and apartment options:
- Worm bin: Place under a sink, in a closet, or on a balcony. Feed modestly, balance bedding with scraps, and keep it moist, not wet.
- Bokashi-to-bed: Ferment kitchen scraps in a sealed bucket, then bury in a planter box or garden bed when available.
- Community compost: If space is tight, use local composting programs and bring home finished compost—or coordinate with neighbors to share a bin.
Keep the workflow light:
- Maintain a countertop caddy with a carbon filter or tight lid.
- Dedicate a “browns tote” next to the bin.
- Do a five-minute weekly moisture and airflow check.
- Harvest compost when a section looks dark, crumbly, and earthy; let it cure for a few weeks, then put it to work.
Consistency—small, regular contributions—makes composting truly easy.
Using finished compost and closing the garden loop
You’ll know compost is ready when it’s dark, crumbly, mostly uniform, and smells like forest soil. A few woody bits are fine. If in doubt, let it “cure” for a couple of extra weeks to stabilize.
Simple ways to use finished compost:
- Topdressing and mulch: Spread 0.5–1 inch around perennials, shrubs, and trees. Lightly cover with straw or leaves to protect soil life.
- Vegetable beds: Rake 1–2 inches into the top few inches of soil before planting, or side-dress heavy feeders like tomatoes and squash midseason.
- Seed starting and potting: Sieve compost through 1/4-inch hardware cloth for a finer texture. Blend with inert materials (coco coir, perlite, or coarse sand) for drainage and consistency.
- Lawn care: In spring or fall, rake a thin layer (about 1/4 inch) across the lawn to boost soil life and water retention.
- Compost tea or extracts: If you use them, soil drenching is straightforward and low-risk. Many gardeners get excellent results simply by mulching with compost instead.
Storage and staging:
- Keep a small “ready bin” or tote near your beds for easy grabs.
- Protect compost from heavy rain to prevent nutrient leaching; a simple cover or lidded tote is enough.
- Keep a sieve handy to remove big bits, which can go back to the active pile.
Build resilience while you garden:
- Easy composting is the foundation of a self-reliant garden. If you’re also interested in water-smart systems that make it easier to keep compost and beds moist, check out SmartWaterBox. For broader garden self-sufficiency and compact growing inspiration, see Aqua Tower.
Helpful resources for a resilient homestead:
- For pantry resilience and waste-minimizing strategies that pair naturally with home composting, consider The Lost SuperFoods.
- For common-sense, at-home preparedness that supports gardening and seasonal independence, explore Home Doctor and URBAN Survival Code.
You don’t need fancy gear or constant turning to get beautiful compost. You need a simple routine, steady inputs, and small adjustments. With those, the garden loop closes itself.
Conclusion
Learning how to make compost the easy way comes down to three habits: match your method to your lifestyle, balance greens with plenty of browns, and keep moisture and airflow in the comfort zone. Pick a low-effort approach—cold compost, a no-turn static pile, a tumbler, trenching, or a worm bin—then commit to a quick weekly check. Within a season or two, you’ll turn everyday scraps into healthy soil that feeds your garden, conserves water, and builds long-term resilience. Start small, keep it simple, and let the microbes do the heavy lifting.
FAQ
What is the easiest way to start composting at home?
Use a small bin or wire cage near your back door, keep a bag of browns (dry leaves or shredded cardboard) next to it, and cap each kitchen scrap deposit with a brown layer. That’s the simplest, low-odor, no-turn system.
How to make compost the easy way without turning?
Build a no-turn static pile with a coarse base for airflow, layer 2–3 parts browns to 1 part greens, keep it as moist as a wrung-out sponge, and cover. Poke a few air holes weekly and you’re done.
What should I not put in easy backyard compost?
Skip meat, fish, dairy, oily foods, diseased plants, and glossy or plastic-coated paper. Avoid large wood chunks. If you can’t run a hot pile, also avoid heavily seedy weeds.
How long does easy, low-maintenance compost take?
A no-turn pile typically takes a few months to mature, depending on temperature, moisture, and material size. Tumblers can finish faster with light weekly mixing; trench composting feeds beds directly as it breaks down in place.
Can I compost in a small apartment?
Yes. Vermicomposting is perfect indoors—balance bedding and small amounts of chopped food scraps, keep it moist (not wet), and harvest vermicast for houseplants or balcony planters. Bokashi is another compact option that pre-processes scraps for later burial in soil.