
Composting turns everyday kitchen scraps and yard waste into a dark, crumbly soil amendment that feeds your plants, improves soil structure, and reduces landfill waste. In this guide, you’ll learn exactly how to start a compost pile, keep it healthy, and use the finished compost in your garden. You’ll also find a printable composting infographic PDF summary near the end to keep on your shed wall or fridge.
If you’re building a resilient, self-reliant home ecosystem alongside composting, you may also appreciate old-school food preservation ideas from The Lost SuperFoods, a companion resource many homesteaders keep for long-term pantry planning.
Table of Contents
Composting fundamentals every beginner should know
At its core, composting is the managed decomposition of organic materials—like vegetable peels, coffee grounds, grass clippings, dry leaves, and shredded cardboard—into stable humus. This happens thanks to a bustling community of microbes, fungi, and soil critters (the “soil food web”). When you maintain the right balance of carbon (“browns”), nitrogen (“greens”), moisture, air, and particle size, they’ll break everything down quickly and without foul odors.
Why compost instead of tossing scraps into the trash? Food waste sent to landfills decomposes without oxygen and produces methane, a potent greenhouse gas. Composting methods are aerobic (oxygen-rich), turning those same scraps into a resource that:
- Improves soil texture and tilth
- Increases water-holding capacity, helping plants weather dry spells
- Adds slow-release nutrients and fosters beneficial microbes
- Buffers pH and reduces erosion
Common misconceptions:
- “Composting stinks.” A well-balanced pile smells earthy. Strong odors signal an imbalance you can fix (covered below).
- “It’s complicated.” You can start simple and get great results. The basic recipe: layer browns and greens, keep it as damp as a wrung-out sponge, and give it air.
- “It attracts pests.” Good bin design, correct inputs, and light covering prevent rodents and flies.
- “It takes forever.” Time varies. Hot piles can finish in a few months; cold piles may take 6–12 months. Vermicompost (worms) can be faster, especially for kitchen scraps.
Whether your goal is waste reduction, healthier garden soil, or both, learning the fundamentals before you build your first pile will save time and frustration later.
Choosing a compost method and the best spot
There’s no single “right” way to compost—choose one that fits your space, effort level, and climate.
Popular methods:
- Open pile or bin (backyard compost): A classic heap or bin made of wood, wire, or plastic. Great for yards with leaves and clippings. Easy to scale.
- Tumbler: A sealed drum you spin for aeration. Neater and faster to turn, ideal for small yards and to deter pests. Batch-based.
- Vermicomposting (worm bin): Red wigglers (Eisenia fetida) turn kitchen scraps into worm castings indoors or on a patio. Low odor, compact, great for apartments.
- Bokashi (pre-composting): Ferments food waste—including small amounts of cooked food—using inoculated bran in an airtight bucket. The fermented material then finishes in soil or a compost bin.
- Trench composting: Bury kitchen scraps directly in garden trenches to decompose in place. Minimal handling, seasonal.
Site selection tips:
- Choose a well-drained, level site with partial shade to prevent drying out in hot climates (or more sun in cool climates to keep piles active).
- Keep it close enough to your kitchen and garden to encourage regular use but not so close to patios or doors that it’s in the way.
- Provide easy access to a water source for maintaining moisture.
- Use a base layer of coarse sticks or wood chips if your soil drains poorly to encourage airflow.
Bin or no bin? Bins neaten the area, deter pests, and help retain moisture and heat. Wire mesh or pallet bins are affordable DIY options. Tumblers excel in tidy suburban settings. Open piles work when you have abundant browns and greens and don’t mind the rustic look.
Local regulations and HOA rules may limit open piles; tumblers and worm bins are often more acceptable. In very cold climates, insulated bins or piles built large enough to retain heat are helpful. In hot, arid climates, shade cloth or a lid reduces moisture loss.
For a resilient backyard system, pairing composting with reliable water access helps everything thrive. If you’re exploring water resiliency for your garden setup, solutions like SmartWaterBox can help you plan practical water independence around your home landscape.
What to compost and the carbon-to-nitrogen balance
Think of ingredients in two categories:
- Browns (carbon-rich): dry leaves, straw, shredded cardboard, paper towels, newspaper, sawdust from untreated wood, wood chips, pine needles, dried plant stems.
- Greens (nitrogen-rich): vegetable and fruit scraps, coffee grounds and filters, tea leaves, fresh grass clippings, green plant trimmings, spent flowers, manure from herbivores (e.g., rabbits, horses, chickens).
Aim for an overall carbon-to-nitrogen (C:N) balance around 25–30:1 for efficient decomposition. You don’t need to memorize exact numbers; a practical rule is:
- Roughly 2–3 buckets of browns for every 1 bucket of greens by volume.
- Adjust as you go—ammonia smells or sliminess mean too many greens; slow breakdown and a dry, woody pile mean too many browns.
What not to put in an open compost pile:
- Meat, fish, or large amounts of dairy and oils (attract pests, slow breakdown)
- Diseased plants or heavily seed-laden weeds if your pile won’t get hot
- Pet waste from dogs/cats (pathogen risk)
- Glossy, waxed, or heavily printed paper and chemically treated wood
- Large branches (chip first) and synthetic materials
- Big citrus peels in bulk can slow worms; okay in moderation in outdoor piles
Chop or shred materials to speed decomposition. Mix wet, sloppy greens (like kitchen scraps) with fluffy browns (shredded cardboard or leaves) to create a breathable structure that holds moisture but doesn’t mat.
Special notes:
- Coffee grounds are actually “green” despite their color; they’re nitrogen-rich and great in moderation.
- Manures from herbivores boost nitrogen; age or hot-compost them before use around edibles.
- Leaves are compost gold. Stockpile dry leaves in fall to use year-round as browns.
How to start a compost pile step by step
Use this simple, repeatable process to build a healthy pile or load a tumbler.
- Prepare the base
- On bare soil, loosen the top few inches to invite soil organisms in.
- Add a 3–4 inch layer of coarse browns (twigs, small sticks, chunky wood chips) to promote airflow and drainage.
- Add your first “recipe” of materials
- Layer approximately 2–3 parts browns to 1 part greens by volume.
- Examples per layer set: 1 bucket kitchen scraps + 2 buckets shredded cardboard and dry leaves + a handful of garden soil or finished compost as a microbial inoculant.
- Moisten as you build
- Mist each layer until it’s as damp as a wrung-out sponge. Excess water squeezes out and chases away oxygen; too little stalls the pile.
- Mix for airflow
- Either alternate layers and gently fluff with a fork, or mix layers lightly so wet greens contact dry browns and air pockets remain.
- Size matters
- For hot composting, aim for a starting volume of about 3x3x3 feet (1 cubic meter). Smaller piles can still work (cold composting) but heat up less.
- Tumblers work in batches; load them to the recommended level, then spin for aeration.
- Cap and tidy
- Cap the top with a brown layer (dry leaves or cardboard) to deter flies and contain odors.
- Covering with a lid, tarp, or breathable mat helps retain moisture in dry climates and sheds excess rain in wet climates.
- Monitor the first week
- A good hot pile warms to the touch within 24–72 hours. Temperatures of 130–150°F (54–66°C) for several days speed decomposition and help kill many weed seeds and pathogens.
- No thermometer? Stick your hand in (carefully); pleasantly warm is great. Scalding hot means lots of greens—add browns and mix if needed.
If you lack enough browns, pause additions and stockpile leaves or shredded cardboard. If you lack greens, collect grass clippings, coffee grounds from a local café, or use small amounts of alfalfa meal or fresh manure to boost nitrogen.
Keeping it going: moisture, air, temperature, and quick fixes
Healthy compost balances four variables:
Moisture: Aim for the wrung-out sponge feel throughout. Too wet (soggy, smelly)? Fork in fluffy browns, poke ventilation holes, and turn to reintroduce air. Too dry (slow, dusty)? Add water while turning; mix in juicy greens or pre-soak browns before adding.
Air: Microbes need oxygen. Turning the pile every 1–2 weeks keeps it aerobic and mixes materials. In tumblers, spin several times 2–3 times per week. For low-effort piles, insert perforated PVC or sturdy sticks vertically to create air flues.
Temperature: Hot piles (130–150°F) break down fastest. If the pile won’t heat, it’s often too small, too dry, or too brown-heavy. Add greens and water, and turn. If it overheats or smells like ammonia, add browns and mix.
Particle size: Smaller pieces decompose faster but can mat. Shred and mix with structured browns to keep airflow.
Troubleshooting quick reference:
- Rotten or sulfur smell: Too wet, compacted, or contaminated. Add lots of dry browns, turn, and cover. Avoid adding oily foods.
- Ammonia smell: Too many greens. Add browns and turn.
- Pile not heating: Add greens, water, and increase pile size. Check airflow.
- Pests/rodents: Use a bin with a secure lid and 1/4-inch hardware cloth floor/sides; bury fresh scraps in the pile and cap with browns; avoid meat/dairy in open piles.
- Flies: Always cover food scraps with browns; consider a tight-lidded tumbler; keep a bucket of shredded paper/leaves as a “sprinkle cap.”
Seasonal and small-space tips:
- Winter: Build larger piles, insulate with straw bales, or accept slower cold composting and resume turning in spring. Vermicompost indoors.
- Summer: Shade the pile, maintain moisture, and turn more often to prevent anaerobic pockets.
- Urban balconies: A compact worm bin or sealed tumbler works well; feed small amounts often. If resilience is a priority in limited space, broader urban-readiness resources like URBAN Survival Code can complement your indoor composting and balcony growing strategies.
When compost is finished and how to use it
Finished compost looks dark and crumbly and smells like forest soil. Most of the original materials are unrecognizable, and the pile no longer heats after turning.
Confirming maturity:
- Bag test: Seal a small sample in a plastic bag for 48 hours. A sour smell suggests it still needs air/curing; earthy smell means mature.
- Germination check: Mix compost 1:1 with seed-starting mix and sprout quick seeds (radish/oats). Good germination and no leaf burn indicate stability.
- Temperature: After turning, a mature pile doesn’t reheat significantly.
Curing:
- Even after the pile looks done, let it “cure” for 2–4 weeks. Store it in a covered pile or bin, slightly moist, allowing microbes to finish stabilizing.
Screening:
- Use 1/2-inch hardware cloth to sift out sticks and chunky bits. Return overs to the next batch as inoculant and structure.
How to use compost:
- Garden beds: Spread 0.5–1 inch over beds in spring and fall; lightly incorporate or use as mulch.
- Planting holes: Mix 10–25% compost with native soil for trees, shrubs, and perennials.
- Top-dress lawns: Apply 1/4–1/2 inch across the surface and water in to improve soil and microbial life.
- Potting mixes: Blend 10–30% compost with materials like coconut coir, perlite, and screened leaf mold for containers.
- Compost extract/tea: If making aerated compost teas, use finished, mature compost and clean equipment. Apply to soil rather than edible leaves to minimize food safety risks.
Remember: Compost is a soil conditioner, not a complete fertilizer. It supplies a broad spectrum of nutrients and biology but can be complemented with specific mineral amendments based on soil tests.
How to start a compost pile in tight spaces
Not everyone has a backyard. You can still turn scraps into soil food with compact systems and good routines.
Apartment-friendly options:
- Worm bin: A tote or purpose-built worm farm fits under a sink or on a balcony. Feed small amounts frequently. Keep bedding (shredded paper, coco coir) moist and fluffed. Harvest worm castings every few months.
- Bokashi: Collect kitchen scraps in an airtight bucket with bokashi bran. After fermenting for 2–4 weeks, bury the material in a planter, raised bed, or community plot to finish breakdown.
- Sealed tumbler: A small dual-chamber tumbler keeps smells in and rodents out on patios. Load one side while the other breaks down.
Community pathways:
- Community gardens: Many accept pre-chopped scraps or finished bokashi. Ask about their guidelines.
- Municipal composting: Check local programs for curbside organics pickup.
- Share with neighbors: Gardeners often welcome clean, pre-chopped scraps and coffee grounds, especially if they have leaves to balance them.
Keep it fresh and pest-free:
- Store kitchen scraps in a sealed caddy or bag in the freezer; add to your system every few days.
- Always cap fresh additions with dry browns (shredded paper works indoors).
- Clean bins regularly and keep bedding balanced in worm systems.
Water management is still vital when space is tight. If you’re designing a balcony or small courtyard system with planters, consider water storage and capture approaches like SmartWaterBox to keep your mini-ecosystem hydrated with minimal waste.
Advanced approaches and pro tips for faster, cleaner compost
Once you’ve got a basic pile going, these refinements can speed results and reduce issues.
“Lasagna” building with a hot start: Mix a high-nitrogen core (fresh grass clippings, coffee grounds, manure) with ample shredded leaves and cardboard. Build to 3x3x3 feet and ensure moisture is perfect on day one. Insert a compost thermometer to monitor 130–150°F. Turn when temps drop below ~120°F to reheat.
Johnson–Su style bioreactor: A low-maintenance, no-turn design using vertical aeration tubes and a wire cylinder. It decomposes slowly over many months into a fungal-rich compost; great if you prefer set-it-and-forget-it.
Leaf mold: Pile leaves alone in a cage and keep them moist. Fungal decomposition creates an exceptional soil conditioner in 6–18 months. Mix into potting blends or mulch beds.
Selective pre-composting: Run kitchen scraps through bokashi, then add to your outdoor pile or bury in a trench. This step speeds final decomposition and improves nutrient retention.
Material prep improves aeration: Shred cardboard across the corrugations; mix various browns (leaves + paper + chips) to avoid compaction. Combine dense greens with fluffier ones to maintain porosity.
Turning schedule rhythm: For hot compost, turn every 5–7 days at first, then every 10–14 days. Each turn adds air, redistributes materials, and recharges heat.
Data makes you better: Note dates, ingredients, moisture observations, and temperatures. You’ll quickly learn the mix that heats reliably in your climate.
Safety and cleanliness: Wash hands after handling raw compost. Keep tools clean. Allow proper curing before using around vegetables. When in doubt, let it mature longer.
Printable help: Check the downloadable composting infographic PDF summary at the end. Keep it on your wall to remember the browns-to-greens ratio, moisture cues, and quick fixes.
Helpful resources for resilient composting and gardening
Balanced, living soil and reliable water make gardens thrive. If you’re assembling a broader self-reliance toolkit, these resources complement your composting journey:
- The Lost SuperFoods — A collection of time-tested preservation and pantry ideas that pair well with homegrown produce and seasonal abundance.
- SmartWaterBox — Practical concepts for building water independence around your home landscape and garden.
- URBAN Survival Code — City-focused readiness strategies that can dovetail with compact composting and balcony growing.
Use them as adjuncts to the techniques you’ve learned here; your compost will supercharge any garden or container setup you build.
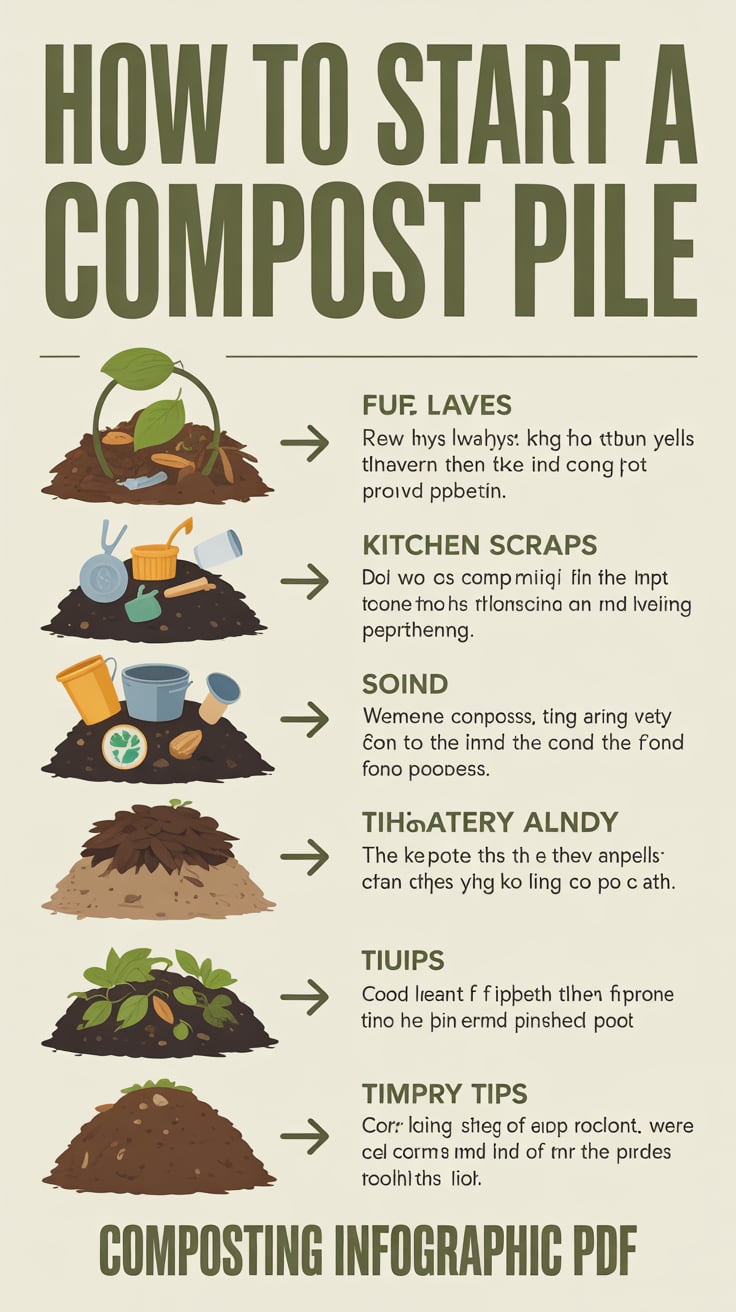
Printable composting infographic PDF and quick-start checklist
Use this condensed checklist as the basis for your printable infographic PDF:
- Choose your method: open bin/pile, tumbler, worm bin, or bokashi.
- Site it: level, well-drained ground; shade in hot climates; near water and kitchen.
- Stockpile materials: browns (leaves, cardboard), greens (scraps, clippings).
- Build the base: 3–4 inches of coarse browns for airflow.
- Layer 2–3 parts browns to 1 part greens; moisten each layer.
- Cap new additions with browns to control odors.
- Maintain moisture like a wrung-out sponge; turn weekly for hot compost.
- Troubleshoot: add browns for odors; add greens/water for slow piles.
- Cure finished compost 2–4 weeks; screen and apply to beds, lawn, and mixes.
Look for the downloadable composting infographic PDF asset provided with this article to print and keep handy in your garden shed.
Conclusion: start your first pile today
You now know how to start a compost pile and keep it humming—choose a method that fits your space, layer browns and greens at a roughly 2–3:1 ratio, maintain sponge-level moisture and good airflow, and turn periodically. With a little attention and a few habit tweaks in the kitchen and yard, you’ll transform waste into rich, living compost that feeds your soil, conserves water, and boosts plant health.
As you build a resilient home ecosystem, you can also pair your composting with broader self-reliance resources such as The Lost SuperFoods and water-readiness concepts from SmartWaterBox. Start small, keep it simple, and let your compost pile do the quiet work of rebuilding your soil—season after season.
FAQ
How long does it take to make compost?
Time varies by method and management. Hot piles can produce usable compost in 8–12 weeks with regular turning and ideal moisture. Cold piles may take 6–12 months. Worm bins often yield castings in 2–4 months. Curing for a few extra weeks after it “looks done” improves stability.
What is the best ratio of browns to greens?
Aim for about 2–3 parts browns to 1 part greens by volume. The goal is an overall C:N around 25–30:1. If you smell ammonia or see slimy clumps, add more browns. If the pile is dry and slow, add more greens and water.
How to start a compost pile without attracting pests?
Use a bin with a lid or a tumbler, line the base with hardware cloth, bury fresh scraps in the pile, and always cap with dry browns. Avoid meat, fish, and large amounts of dairy or oils. Keep the area tidy and turn regularly to deter rodents and flies.
What can I compost from the kitchen?
Fruit and vegetable scraps, coffee grounds and filters, tea leaves, eggshells (crushed), and paper towels/napkins (unbleached and not greasy). Chop scraps for faster breakdown. Freeze them in a sealed container to control odors and add them in batches.
How to start a compost pile in an apartment?
Try vermicomposting (a small worm bin) or a sealed tumbler on a balcony. Alternatively, use bokashi to ferment scraps, then bury them in a community garden or planter to finish. Keep browns (shredded paper) on hand to cover fresh additions and control moisture.