
Turning kitchen scraps into plant-boosting soil is one of the most satisfying upgrades you can make in your garden. This guide breaks down the science and practice behind vermicomposting—better known as worm composting—so you can confidently create living, nutrient-rich worm castings at home. You’ll get clear gardening tips for how worm composting works in real bins, how to keep your worms thriving, and how to use their castings and “worm tea” for healthier, more resilient plants.
If you’re building a garden that thrives even in dry spells, consider adding better water management to your setup. Tools like SmartWaterBox can help you plan and organize water use so your worm-composted soil stays evenly moist.
Table of Contents
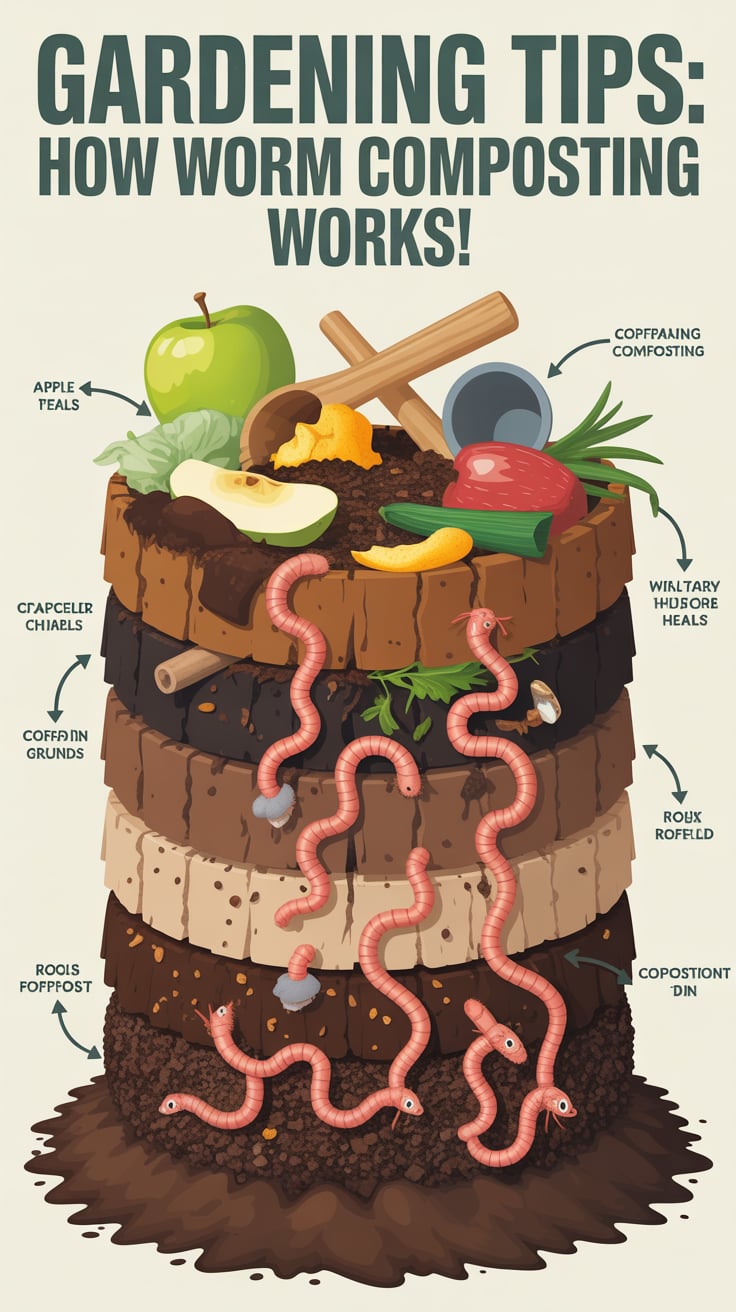
Gardening Tips: How worm composting works! beneath the surface
Worm composting is a living ecosystem where worms and microbes team up to transform organic waste into humus-like castings rich in plant-available nutrients and beneficial biology. In the process, your food scraps shift from “trash” to a powerhouse soil amendment that improves structure, water retention, and overall plant vigor.
- Who does the work: Composting worms (most commonly Eisenia fetida and E. andrei, also called red wigglers) are surface feeders that thrive in moist, oxygen-rich environments full of partially decomposed organic matter. They don’t tunnel deep like earthworms found in garden beds—instead, they graze near the surface where the food is.
- The microbe engine: Microorganisms kick off decomposition by breaking down kitchen scraps and bedding. As worms eat this microbe-rich material, their gizzards grind it with tiny grit, and their guts further condition it. The result, their castings, are microbially active—a kind of living inoculant for your soil.
- What castings are: Fine, crumbly granules that hold moisture well and contain stabilized nutrients in forms plants can access gradually. The structure helps soil resist compaction, improves aeration, and encourages robust root development.
- Why it smells like earth: A healthy worm bin smells like forest soil because the system is aerobic (oxygen-present). When conditions tip anaerobic (too wet, compacted, overfed), odors arise—your cue to adjust moisture, airflow, or feeding.
At a glance, this is how the cycle runs:
- Add bedding and a modest amount of food scraps. 2) Microbes colonize. 3) Worms graze on the microbe-rich material. 4) Castings accumulate. 5) You harvest castings to enrich potting mixes, topdress garden beds, and brew diluted solutions for soil drenching.
Why worm castings are gold for gardens
Vermicompost is prized because it upgrades multiple aspects of soil health at once without burning plants or overwhelming young seedlings.
- Better structure and water handling: Castings act like tiny sponges, increasing water-holding capacity while keeping pores open for airflow. Soils amended with vermicompost resist crusting and compaction and make it easier for roots to explore.
- Gentle nutrient release: Worm castings contain a balanced spectrum of plant nutrients in slow-release forms. They won’t behave like a fast-acting salt fertilizer. Instead, they feed the soil food web, which in turn feeds your plants.
- Seedling and transplant support: Many growers blend 10–20% castings into seed-starting mixes or sprinkle a handful into transplant holes. The microbially active environment can reduce stress and jumpstart root growth.
- Potting mix and houseplant health: Castings help container media hold moisture more evenly, which reduces the risk of hydrophobic dry pockets. They also provide ongoing, mild fertility for potted herbs and ornamentals.
- “Worm tea” clarity: Two liquids get confused:
- Aerated worm compost tea (AWCT): Brewed by aerating water with a small amount of finished castings for a limited time. Gardeners use it as a quick microbe boost for soils. Keep everything clean and use promptly.
- Leachate: Liquid that drains out the bottom of some bins. Because it can pass through partially decomposed material, it may contain anaerobic byproducts. Many gardeners either avoid using leachate or apply it cautiously to soil (not leaves) after diluting, and only if it smells earthy—not sour or rotten.
Where to apply castings:
- Topdress around vegetables, perennials, and shrubs
- Blend into raised beds at planting
- Work into seed-starting and potting mixes
- Scratch into the surface of containers mid-season
- Water in diluted AWCT as a soil drench
Build a simple worm bin that thrives
You don’t need fancy equipment to start. A basic tote, breathable bedding, the right worms, and consistent moisture will produce castings for years.
Choose a bin style:
- Single tote or wooden box: Drill ventilation holes along the sides and a few small drainage holes in the bottom. Elevate on blocks with a tray underneath if indoors.
- Stacked tray systems: Make harvesting easier by encouraging worms to migrate upward to fresh food.
- Flow-through bins: Castings drop from the bottom as you feed from the top. Great for steady production.
Bedding basics: Shredded cardboard, paper, aged leaf mold, and coco coir all work. Mix different textures so bedding stays fluffy and airy. Moisten to a “wrung-out sponge” feel: damp, not dripping. Bedding is both home and food; keep 60–80% moisture for most systems.
The right worms: Red wigglers (Eisenia fetida/Eisenia andrei) are ideal for bins. Don’t use nightcrawlers or common garden worms; they need deeper, cooler soils.
Location matters: Keep the bin out of direct sun and protected from heavy rain or extreme temperatures. Ideal range is roughly 55–77°F (13–25°C). A basement, garage, shaded porch, or kitchen corner are good options.
How many worms: A modest start—say 0.5–1 pound of worms—can handle the scraps from a small household once established. Worms can consume up to roughly half their body weight in food per day when conditions are ideal, but feed conservatively at first.
Start-up steps:
- Fill the bin half full with moistened bedding.
- Add a small starter meal (a cup or two of chopped veggie scraps).
- Gently introduce worms and cover with a dry bedding layer to deter gnats.
- Leave the lid ajar or use a breathable cover. Let them settle for a week before adding more food.
Urban gardeners who want to integrate composting with overall resilience can benefit from simple preparedness frameworks. For a compact, skills-first approach to self-reliant city living, explore URBAN Survival Code.
Practical gardening tips: how worm composting works day to day
Daily and weekly rhythms keep your bin balanced. The goal is to keep things airy, moist, and moderately fed so the microbe–worm engine stays aerobic and stable.
Feeding strategy:
- What to add: Vegetable peels, cores, coffee grounds (with filters), tea leaves, crushed eggshells, stale bread in small amounts, pulverized leaves.
- What to limit or avoid: Meat, dairy, oily foods, large amounts of citrus or spicy scraps, salty foods, and anything moldy or chemically treated.
- Chop scraps small to speed decomposition and reduce hotspots. Freeze/thaw to soften fibrous materials like kale stems before feeding.
Carbon-to-nitrogen balance:
- Balance “greens” (moist, nitrogen-rich food scraps) with “browns” (dry, carbon-rich bedding like shredded cardboard).
- A simple rule: After every feeding, cover with a generous layer of dry bedding. This suppresses odors and fruit flies while keeping the top layer light and breathable.
Moisture and aeration:
- Squeeze a handful of bedding; you should get a drop or two of water at most. If it’s dripping, add dry bedding and stir gently. If it’s dry and crunchy, mist with non-chlorinated water and mix.
- Fluff the top few inches weekly to prevent compaction. Don’t churn the bin aggressively—worms prefer a stable habitat.
pH and grit:
- Worms tolerate a mild pH range, but too much acidic material at once (like citrus) can stress them. Crushed eggshells or a light sprinkle of pulverized oyster shell provide grit and help buffer acidity.
- If you notice a sour smell, pause feedings and add more bedding.
Feeding rate rule of thumb:
- Start small: add a cup or two of scraps. If the previous feeding has mostly vanished in 3–5 days and the bin smells pleasant, add a bit more.
- Bury food in pockets, rotating around the bin. This spreads activity and prevents concentrated wet zones.
Keep notes:
- Jot down what and how much you feed and how the bin responds. You’ll quickly dial in a rhythm that fits your climate, bin size, and household scrap stream.
Harvesting castings and making the most of worm “tea”
Once the bin fills with dark, fine crumbly material and fewer identifiable food bits remain, it’s time to harvest. Depending on feed rate, temperature, and bin style, this might be every 2–4 months.
Harvesting methods:
- Side-to-side migration: Push castings to one side and add fresh bedding/food to the other. Over a week or two, worms migrate to the new buffet. Scoop out the nearly worm-free castings from the original side.
- Light method: On a tarp under bright light, form a few small piles. Worms move away from light; skim the top repeatedly until you have mostly worms at the bottom. Return worms to the bin with fresh bedding.
- Screen and sift: Pass semi-finished material through a 1/4″–1/8″ screen to separate castings from larger fibers and worms. The oversized bits go back in as “living” bedding.
- Flow-through collection: For bins designed to release castings from the bottom, trim off small amounts regularly.
Using your castings:
- Seed starting and potting: Mix 10–20% castings into soil blends. They improve structure and supply gentle nutrition.
- Transplants: Add a handful or two to planting holes and water in.
- Topdressing: Apply a thin layer around the drip line of established plants and gently scratch in.
About liquids:
- Leachate: If your bin collects liquid, check smell first—earthy is okay, sour is not. When in doubt, skip it. If it smells fine, many gardeners dilute at least 1:10 and apply to soil only.
- Aerated worm compost tea (optional): Brew with clean equipment and use promptly. Many gardeners use it as a soil drench to boost microbial activity, especially after disturbance or transplanting. Avoid storing for long; use the same day for best results.
Tips for cleanliness:
- Use clean buckets, air stones, and tubing if brewing.
- Keep castings away from pet waste or diseased plant matter. Stick to kitchen and garden greens plus safe browns.
- Wash hands after handling compost materials and keep food-prep surfaces separate.
Troubleshooting a worm bin like a pro
Even well-run bins hit speed bumps. The fixes are usually simple and rooted in the same fundamentals: air, moisture, and balance.
It smells bad:
- Cause: Overfeeding, poor airflow, or too wet.
- Fix: Stop feeding for a week, fluff the top layers, and add lots of dry bedding. Ensure side ventilation holes aren’t blocked.
Fruit flies or fungus gnats:
- Cause: Exposed food, too wet top layer.
- Fix: Always bury food and cover with dry bedding. Consider a tight-weave fabric cover under the lid. Add a pinch of garden soil to introduce predatory mites and beneficial microbes. Sticky traps help catch adults.
Worms trying to escape:
- Cause: Stress from heat, acidity, flooding, or anaerobic conditions.
- Fix: Restore balance—add dry bedding, mix gently to aerate, reduce citrus or acidic foods, and move the bin to a cooler area. Check for standing leachate; drain if needed.
Too wet or too dry:
- Too wet: Add shredded cardboard, paper, or coir. Increase airflow. Pause feeding watery foods like melons.
- Too dry: Mist with non-chlorinated water and mix in moist bedding. Keep a lid or breathable cover in place.
Temperature swings:
- Heat wave: Move to shade, increase ventilation, freeze scraps and bury them to add cool pockets, feed less.
- Cold snap: Insulate the bin with blankets or straw, reduce feedings, move it indoors or to a protected garage if possible.
Pests:
- Ants: Place bin legs in shallow water trays or relocate to a new spot. Reduce dryness that attracts ants.
- Mites and springtails: Common and usually harmless detritivores. If numbers explode, reduce moisture and feedings briefly.
For city dwellers, building everyday resilience—food, soil, and water—works best with simple systems. If you want a structured playbook for urban self-reliance, check out URBAN Survival Code for additional strategies you can apply alongside vermicomposting.
Scaling your vermicompost system for any space
Whether you’re in a studio apartment or on a suburban lot, you can tailor worm composting to your goals.
Small spaces:
- Slim bins under sinks or in closets work well if you manage moisture and odors. Stacked tray systems save floor space.
- In vermicompost-heavy potting mixes, you can keep herbs, greens, and microgreens productive year-round.
Balconies and patios:
- A lidded tote or wooden box tucked into a shaded corner is enough to absorb weekly kitchen scraps.
- Mulch containers with shredded leaves plus occasional castings to stabilize moisture in windy conditions.
Backyard setups:
- Windrows: Long, low mounds of bedding and food under a breathable cover are ideal for higher volumes.
- In-bed worm trenches: Dig a trench between plant rows, fill with shredded browns and scraps, and cover with soil. Worms self-regulate and feed nearby roots.
- In-situ worm towers: Bury a perforated pipe or bucket partially in the bed. Add scraps into the tower; worms move in and out, feeding roots.
Winterizing:
- Insulate with straw bales or blankets, reduce feedings, and rely on browns during cold months. Many move bins indoors temporarily.
- Avoid freezing solid; it can kill worms or severely slow the system. If a freeze is unavoidable, protect a small “core” of the bin where worms can cluster.
Integrating with irrigation:
- Because castings hold water, beds amended with vermicompost need less frequent watering. Combine topdressing with mulch to extend intervals between waterings.
- Keep irrigation gentle. Drip or micro-spray helps deliver moisture where roots and microbes live, maintaining a steady habitat for soil life fueled by your castings.
Planning for drought resilience:
- Build organic matter gradually with regular castings applications.
- Water thoroughly, less often, to encourage deeper rooting.
- Capture and store water where possible so you can keep bins and beds consistently moist. Simple organizational tools like SmartWaterBox can help you plan watering cycles and storage so your vermicompost keeps delivering.
Gardening Tips: How worm composting works! in real-world applications
Let’s put the pieces together with practical workflows you can follow season after season.
Weekly routine:
- Feed small amounts and cover with bedding.
- Mist if dry; add shredded cardboard if wet.
- Fluff top layers gently.
- Wipe the bin walls and lid to deter condensation drips.
Monthly checkup:
- Assess volume and texture. If you see lots of fine crumbs and few food bits, begin planning a harvest.
- Screen a small sample. If it’s mostly castings with a soil-like smell and minimal uncomposted fibers, you’re close.
Harvest cycle:
- Migrate or light-harvest a portion while maintaining the rest.
- Replace the harvested volume with fresh, moistened bedding to keep total bin mass stable.
- Give worms a light feeding after disruption; they’ll rebound quickly.
Garden integration:
- Early season: Work castings into seed-starting mixes and planting holes.
- Mid-season: Topdress tomatoes, peppers, cucumbers, and heavy feeders. Scratch in lightly and water well.
- Late season: After harvests, add castings and mulch to build soil biology heading into winter.
Container playbook:
- Blend 10–20% castings into fresh media.
- Topdress thinly around the root zone monthly.
- Use a diluted soil drench of aerated compost tea to refresh tired pots, especially after heat stress.
Lawn upgrade:
- After aerating or slicing, brush a thin layer of castings over the turf and water in. You’ll encourage a denser, more resilient lawn without synthetic quick fixes.
Quick start resources:
- For streamlined urban readiness and skills that complement small-space gardening and composting, explore URBAN Survival Code.
- For water planning that helps keep bins and beds consistently moist, see SmartWaterBox.
Tools and resources for resilient composting
- SmartWaterBox: Plan and organize garden water use so your worm bins and beds stay evenly moist during dry spells. SmartWaterBox
- URBAN Survival Code: A practical framework for city-based resilience that pairs naturally with small-space vermicomposting. URBAN Survival Code
Conclusion: a living system that pays you back
When you understand the biology and rhythms behind it, worm composting is remarkably forgiving—and incredibly rewarding. You feed your bin a steady diet of kitchen scraps and bedding, maintain a moist, airy habitat, and let worms and microbes transform waste into potent castings that strengthen soil, support roots, and smooth out watering needs. With these gardening tips, how worm composting works becomes second nature: a quiet, daily practice that delivers healthier plants, less waste, and a more resilient garden.
FAQ
What worms should I use for a home worm bin?
Use composting worms such as red wigglers (Eisenia fetida/E. andrei). They thrive in shallow, well-aerated bins and process organic matter quickly. Avoid nightcrawlers or common garden worms; they prefer deeper soils and won’t perform well in bins.
How fast do worms turn scraps into compost?
Under good conditions, worms can eat up to roughly half their body weight in food per day. Expect a steady harvest every 2–4 months depending on temperature, feed rate, and bin size. Start small and increase feedings as the system stabilizes.
Which foods are best—and which should I avoid?
Best: fruit and vegetable scraps, coffee grounds and filters, tea leaves, crushed eggshells, and shredded leaves. Avoid or limit: meat, dairy, oily foods, lots of citrus, spicy leftovers, and anything moldy or chemically treated. Always cover feedings with dry bedding.
What’s the difference between leachate and worm tea?
Leachate is the liquid that may drain from some bins; use cautiously and only if it smells earthy, diluting at least 1:10 and applying to soil, not leaves. Aerated worm compost tea is separately brewed from finished castings and used promptly as a soil drench.
Can I vermicompost in an apartment, and are there odors?
Yes, a small tote or stacked tray bin fits easily in a closet, under a sink, or on a balcony. A healthy bin should smell like forest soil, not garbage. If you notice odors, it’s a sign to reduce feeding, add dry bedding, and fluff the top layers for airflow.